Mobile home flooring is not the same decision as flooring for a site-built house. The particleboard subfloor, the steel chassis that flexes with temperature changes, and the moisture that creeps up from the underbelly all eliminate options that work perfectly fine in a regular home. Ceramic tile will crack. Solid hardwood will warp. Glue-down flooring will separate. This guide covers the five flooring types that actually work in manufactured homes, ranked by performance — with real cost estimates, installation notes, and one section on what to absolutely avoid.
Quick summary: Best overall → LVP • Best budget → Sheet vinyl • Best for looks → Engineered hardwood • Never use → Ceramic tile or solid hardwood
Why mobile home flooring is different
Before you spend a single dollar on materials, you need to understand why manufactured homes are structurally different from site-built homes — because those differences directly control which floors will last and which will self-destruct within a year.
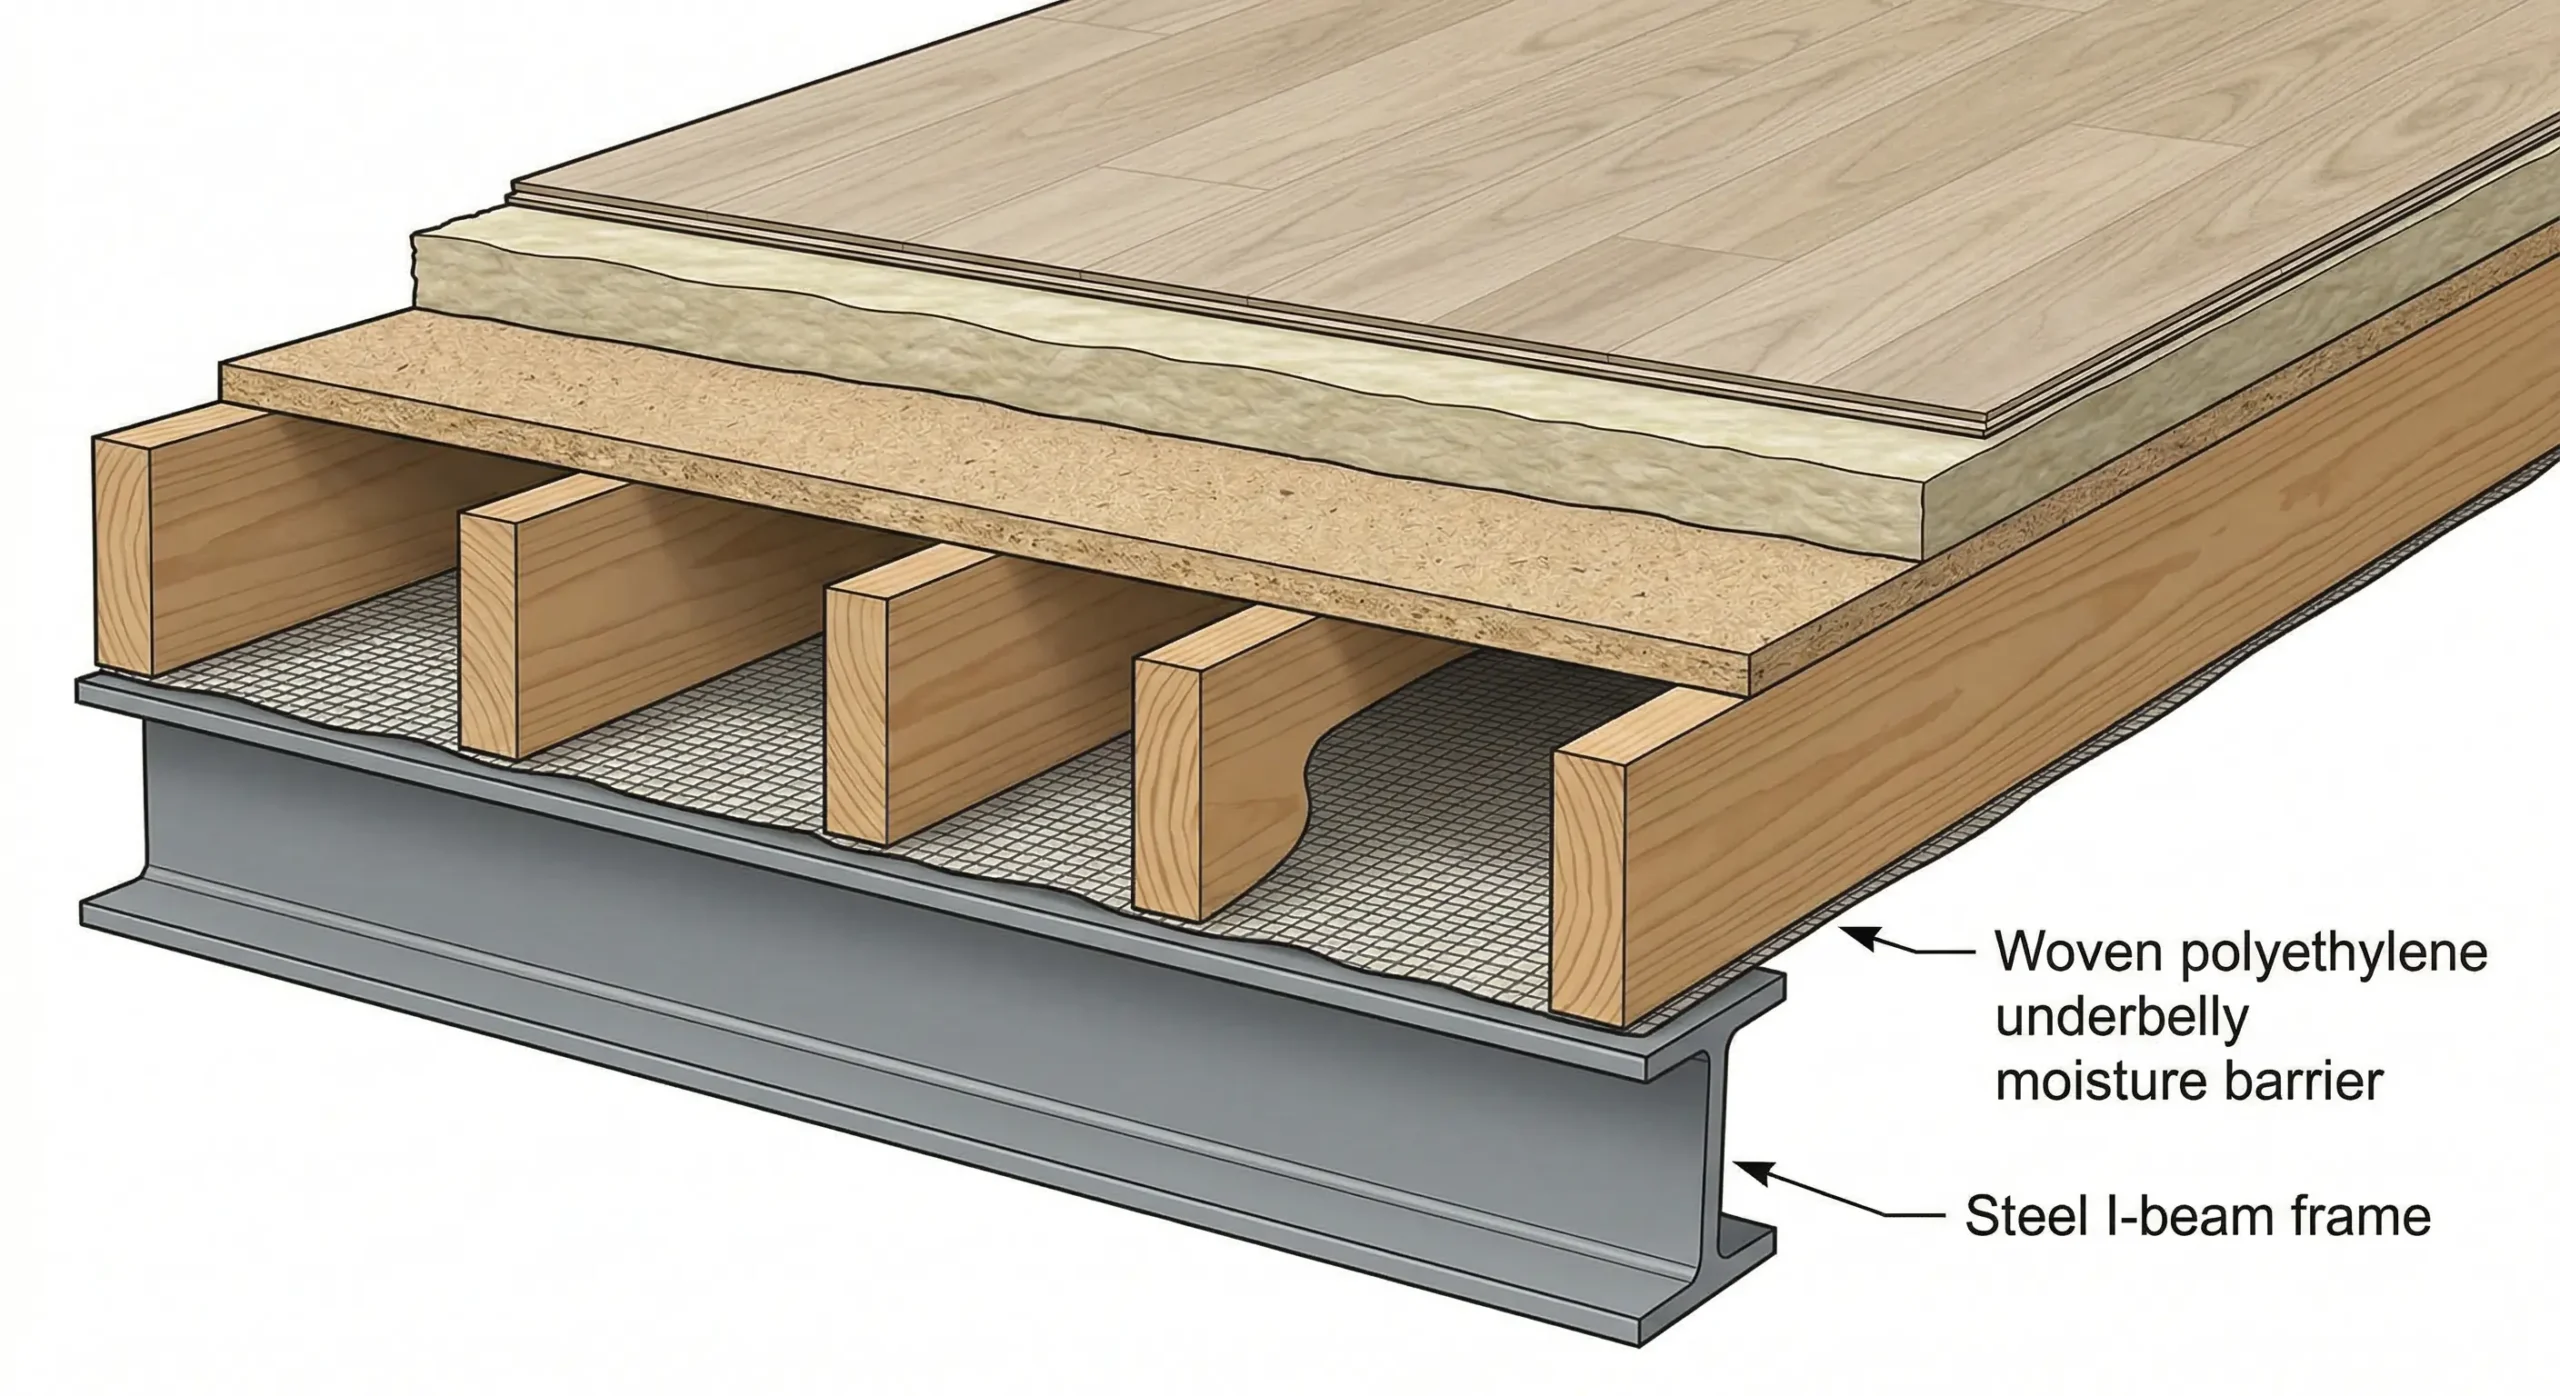
The subfloor is the weak point. Most mobile homes built before the 2000s have particleboard subfloors. Unlike plywood, particleboard has no cross-laminated wood fibres — it is compressed sawdust held together with resin, and the moment it gets wet it swells, crumbles, and loses all structural integrity. It cannot be dried out and saved. Newer manufactured homes use OSB or exterior-grade plywood, which are more moisture-resistant, but even these need protection from below.
The steel chassis flexes. Your home sits on steel I-beams, not a poured concrete foundation. Steel expands and contracts with temperature. On a standard 80-foot single-wide, seasonal temperature shifts can cause the chassis to change length by nearly half an inch. That constant slow movement creates shear stress on any rigid flooring material bonded to the subfloor — which is what cracks tile grout, pops tiles loose, and causes glue-down adhesives to fail.
Moisture comes from below. The underbelly — the woven polyethylene membrane beneath your floor joists — separates the home from the crawlspace and ground. When it is torn or poorly sealed, ground moisture evaporates upward into the subfloor cavity. If you lay an impermeable surface floor on top, that moisture gets trapped directly against the particleboard and accelerates rot from underneath. This is why mobile homes with “brand new flooring” installed by flippers often fail within months — the new waterproof floor sealed the existing moisture damage in.
Room dimensions are non-standard. Mobile homes frequently have irregular room sizes that require more cuts and more planning than a standard installation guide assumes. Always budget 10–15% extra for waste.
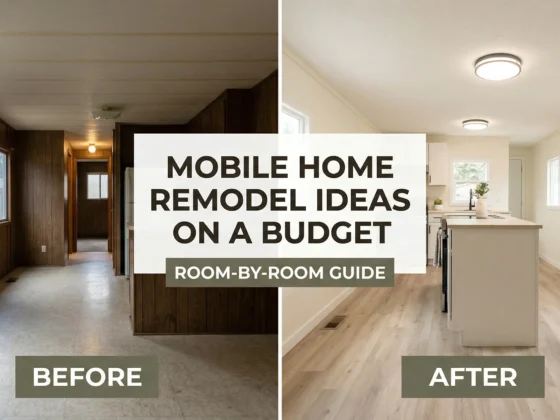
📖 Planning a broader renovation alongside your floors? Mobile Home Remodel Ideas on a Budget: Room-by-Room Guide — covers every room with real costs and DIY difficulty ratings.
Best flooring options for mobile homes (ranked)
1. Luxury Vinyl Plank (LVP) — best overall $2.00–$5.00 per sq ft
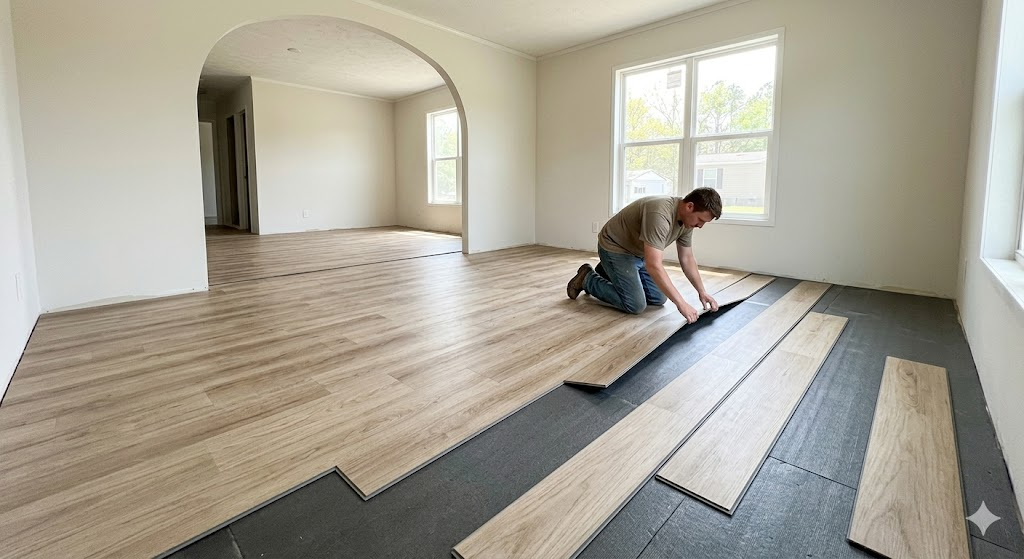
LVP is the gold standard for manufactured home flooring in 2026. It is 100% waterproof, installs as a floating floor that moves independently of the chassis, and its rigid SPC (Stone Plastic Composite) core bridges minor subfloor imperfections without cracking. When the steel frame expands in summer heat or contracts in a cold snap, a properly installed LVP floor simply moves with it rather than fighting it.
Key specifications to look for:
- Minimum 6-mil wear layer — the clear top coat that protects against scratching. Go 12-mil to 20-mil in kitchens and hallways.
- SPC rigid core — more dimensionally stable than older WPC cores under temperature swings.
- Click-lock floating installation — never glue LVP down in a mobile home.
- Pre-attached underlayment — saves a step and ensures the moisture barrier is correct.
- Minimum 6mm total thickness — 8mm is the recommended standard for manufactured housing.
Acclimate planks inside your home for 48 hours before installation. Leave a mandatory 1/4-inch expansion gap around every wall and fixed obstacle. Skipping this gap is the most common reason LVP buckles in the centre of the room — heavy furniture or a kitchen island that pins the floor prevents the natural expansion and the force has to go somewhere.

Affiliate link — we may earn a small commission at no extra cost to you.
⚠️ Warranty check: Many LVP manufacturers void their warranty if the home is not climate-controlled (typically 60°F–85°F). If your mobile home is seasonally vacant and reaches freezing temperatures, check the warranty terms before purchasing.
Top products: Lifeproof Sterling Oak 6 MIL Rigid Core LVP, MSI Everlife Rigid Core, Shaw Catalyst.
Realistic lifespan: 15–25 years on a sound subfloor.
Suitable for: Every room — kitchens, bathrooms, laundry rooms, living areas.
2. Sheet vinyl — best budget option $1.00–$3.00 per sq ft
Sheet vinyl is the original mobile home floor and it remains one of the smartest budget choices available. A single seamless sheet means there are no joints for moisture to penetrate — which makes it outstanding for bathrooms and kitchens where water exposure is constant and joints are a liability.
What to look for:
- Fiberglass backing, not felt backing. Fiberglass backing provides dimensional stability and allows loose-lay or perimeter-tape installation without full-spread adhesive — critical because any adhesive must flex with the chassis or it will fail.
- 6-mil to 10-mil wear layer minimum. Anything thinner will show wear within a couple of years in a busy household.
The installation mistake that ruins sheet vinyl in mobile homes: failing to seal the perimeter edges in wet rooms. Water that migrates under an unsealed edge gets trapped against the subfloor and causes hidden rot you won’t discover until the toilet starts to sink.
Top products: Mannington Sobella LVS Platinum Series.
Realistic lifespan: 10–15 years.
Suitable for: Kitchens, bathrooms, laundry rooms. Outstanding whole-home value when budget is the primary constraint.
3. Engineered hardwood — best for looks $4.00–$10.00 per sq ft
If you want the look and feel of real wood without the warping risk of solid hardwood, engineered hardwood is the premium option. The construction — a real wood veneer bonded over multiple layers of plywood — gives it dimensional stability that solid wood cannot match in the moisture-fluctuating environment of a manufactured home.
Critical specifications:
- Minimum 3-ply construction — more plies means more resistance to flex and humidity swings.
- Floating installation only — never nail or staple into a mobile home subfloor. The chassis moves. Mechanical fasteners loosen and result in a squeaky, gapping floor within a year.
- Premium acoustic and vapour barrier underlayment — mandatory, not optional.
Acclimate planks to your home’s humidity level for at least 48 hours. High-quality engineered hardwood with a thick veneer can typically be lightly sanded and refinished once during its lifespan.
Top products: Bruce, Mohawk TecWood, Bjelin Hardened Wood.
Realistic lifespan: 20–30 years.
Suitable for: Living rooms, dining rooms, bedrooms only. Strictly avoid bathrooms, kitchens, and laundry rooms.
4. Laminate — budget wood-look option $1.50–$4.00 per sq ft
Laminate gives you wood aesthetics at a fraction of the cost of engineered hardwood, and its melamine wear layer is highly scratch-resistant — making it a solid choice for living rooms and bedrooms. However, its HDF (High-Density Fibreboard) core is more moisture-sensitive than LVP, which limits where you can safely use it in a manufactured home.
Non-negotiable requirements for mobile home laminate:
- Minimum 10mm thickness — thinner laminate sounds hollow and feels unstable underfoot on a mobile home subfloor.
- AC3 or AC4 wear rating — residential durability minimum.
- 6-mil vapour barrier underlayment — the single most important accessory. Without it, moisture from below destroys the HDF core from underneath.
- T-molding transition strips every 30 feet — laminate expands more aggressively than LVP. In a large double-wide without transition breaks, the expansive forces will buckle the entire floor.
Top products: Pergo Outlast+, Hillside Laminate series.
Realistic lifespan: 10–15 years.
Suitable for: Living rooms, hallways, bedrooms. Avoid kitchens, bathrooms, laundry rooms, and entryways.
5. Peel-and-stick vinyl tiles — best for DIY beginners $0.50–$2.00 per sq ft
Peel-and-stick tiles are the most beginner-friendly option available — no tools, no underlayment required, and a small bathroom can be done in an afternoon. They are a practical choice for small bathrooms, closets, and secondary bedrooms where you want a quick visual refresh without a major project.
The honest trade-off: lifespan is shorter than LVP at 3–8 years, and they are sensitive to temperature extremes. In an unoccupied mobile home during summer with no climate control, the adhesive softens in the heat and tiles shift, shrink, and leave sticky gaps that collect dirt.
For the adhesive to bond properly, the subfloor must be spotlessly clean and primed with a latex flooring primer. Applying peel-and-stick directly to raw particleboard or OSB guarantees failure — microscopic wood dust neutralises the adhesive immediately.
Minimum specification: 2mm overall thickness.
Top products: TrafficMaster, Achim Home Decor.
Suitable for: Small bathrooms, closets, low-traffic secondary bedrooms only.
Flooring to NEVER use in a mobile home
This section does not exist in most competitor articles — which is exactly why so many mobile home owners end up with a failed floor six months after installation. These are the materials that will not work, no matter how good the installation is.
Ceramic or porcelain tile.
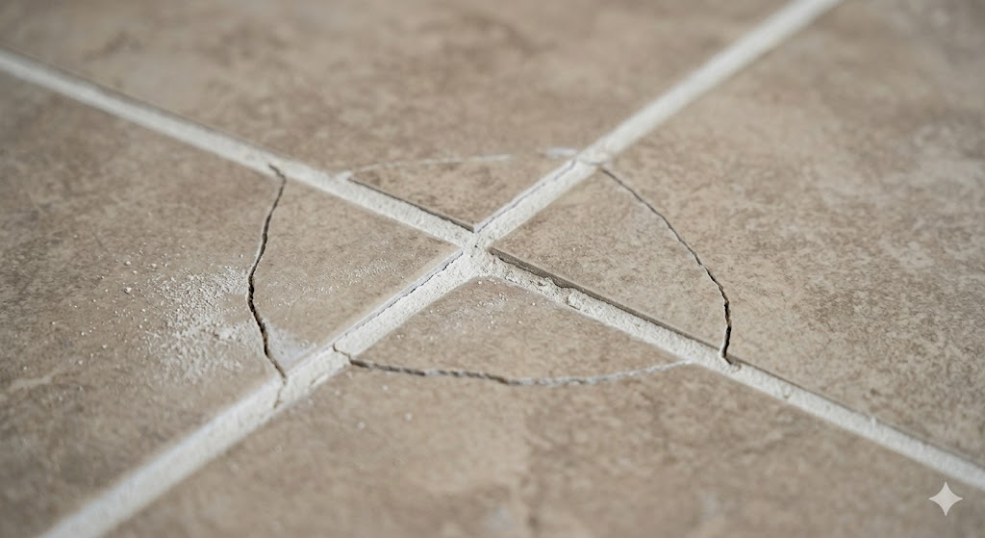
The most destructive flooring choice for a manufactured home. As the steel chassis expands and contracts with seasonal temperature changes, the rigid mortar and grout absorb the shear stress until they crack. Grout fails first, then tiles pop loose or fracture entirely. The weight problem compounds the structural risk: under HUD Code (24 CFR 3280.305), mobile home floor assemblies are engineered for a minimum live load of 40 lbs per square foot. A standard ceramic tile installation in a mortar bed adds up to 23 lbs per square foot of permanent dead load — before a single piece of furniture. In double-wides, the marriage line makes this worse, as the two independent chassis settle at different rates and destroy any continuous tile installation laid across the joint.
Solid hardwood.
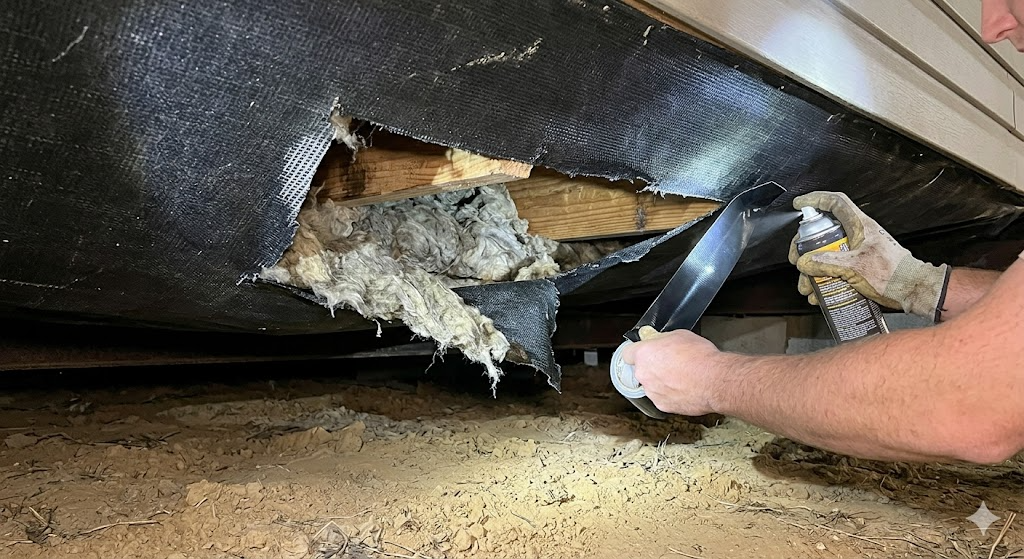
Solid wood is deeply hygroscopic. Underbelly moisture vapour diffuses upward through the subfloor and enters the unsealed underside of the hardwood planks. When the wood’s moisture content exceeds 12%, irreversible warping, cupping, and buckling begins. Sealing the underbelly helps but does not eliminate the atmospheric humidity and temperature swings in the crawlspace that continue to drive moisture upward through even a good vapour barrier.
Glue-down flooring of any type.
Standard flooring adhesives cure into a rigid or semi-rigid bond. When the chassis moves, the subfloor moves with it. The adhesive cannot flex to accommodate that movement — so it shears. The failure is visible: bubbling sheet vinyl, raised ridges where planks are forced together, and separating planks that leave gaps. The only exception is a manufactured home permanently placed on a continuous poured-concrete foundation, eliminating all chassis flex.
Heavy stone, slate, or thick tile.
Natural stone installations can exceed 30 lbs per square foot of dead load — consuming almost all of the 40 psf structural capacity of the floor assembly before anyone walks on it. Homeowners who install heavy stone flooring in mobile homes frequently report visible floor sagging within years of installation.
✅ Real-world confirmation: On Reddit’s r/ManufacturedHome and r/Flooring, homeowners consistently report the same failure patterns — ceramic tile cracking across the marriage line, toilets sagging through rotted particleboard, and “brand new LVP” installed by flippers collapsing because it was laid over unrepaired water damage. These aren’t edge cases. They are the predictable outcome of ignoring the structural science above.
Check your subfloor first — this step most people skip
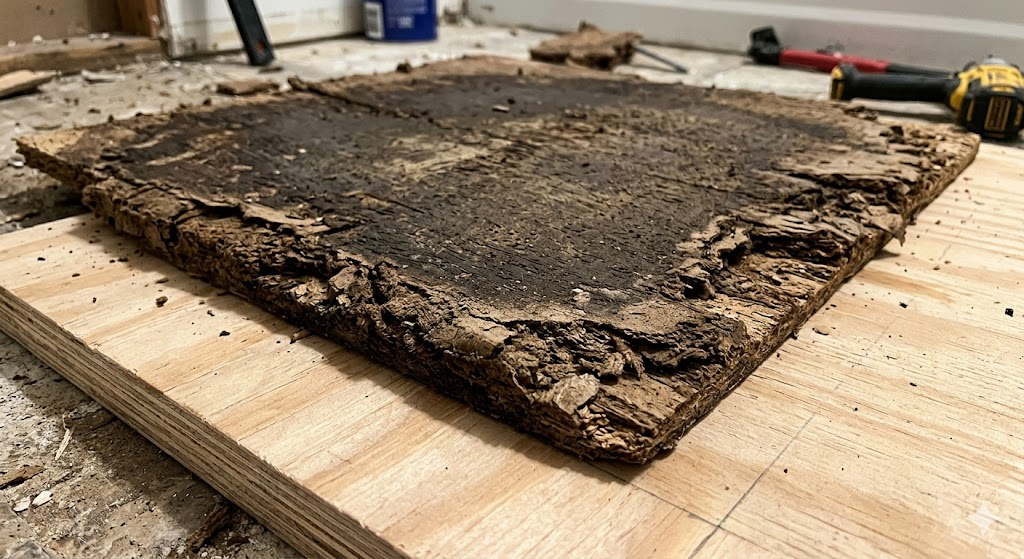
Installing new flooring over a damaged subfloor is the single most expensive mistake a mobile home owner can make. The new floor will fail within 3 to 12 months as the compromised particleboard compresses under foot traffic, snapping the locking joints of your new LVP and leaving you with a ruined floor and the original subfloor problem still unaddressed underneath.
How to inspect your subfloor before spending anything on new flooring:
You need a heavy screwdriver or awl, a pinless moisture meter if available, and 20 minutes. Walk every room, pressing the screwdriver firmly into the subfloor at the highest-risk zones:
- Directly around the toilet base
- Around the bathtub perimeter
- Below and in front of the water heater
- In front of the kitchen sink
- Under or beside the HVAC air handler
- Near all exterior door thresholds
Healthy plywood or OSB will feel rigid and resist the screwdriver. Water-damaged particleboard will yield immediately — spongy, or crumbling like wet cardboard.
If you find soft spots, here is the exact repair process:
1 Set your circular saw blade depth to exactly match your subfloor thickness — typically 3/4-inch. This prevents cutting into plumbing or electrical runs directly below the subfloor.
2 Cut out the damaged section in a rectangle. Cuts parallel to the floor joists must land squarely over the joist centreline so the new patch has solid nailing surface on both edges.
3 Replace with 3/4-inch exterior-grade plywood or AdvanTech panel. Never use particleboard or standard MDF as a repair material.
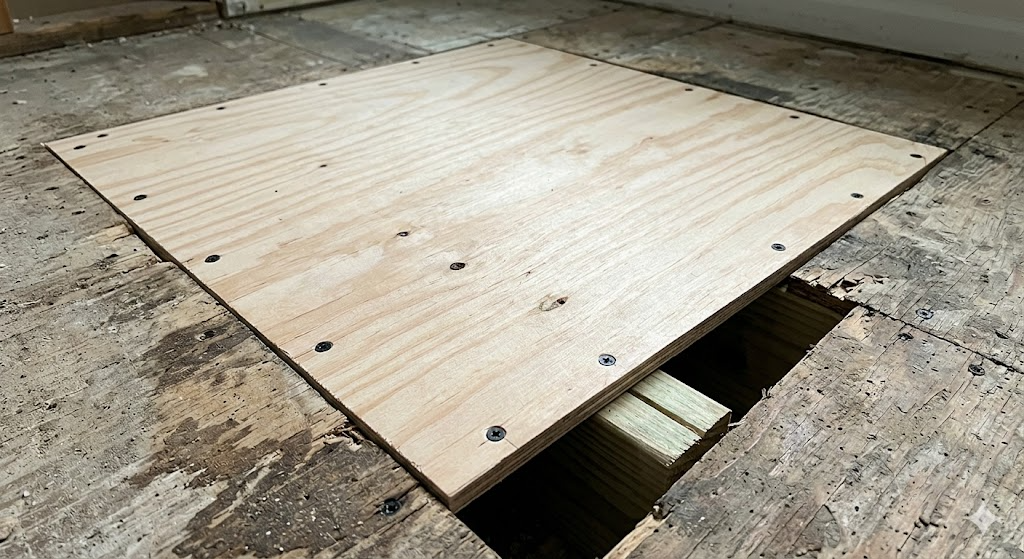
4 If the joist itself is rotted, sister a new pressure-treated 2×6 or 2×8 alongside it before patching.
5 Apply polyurethane construction adhesive to the joists, drop the patch in, and fasten with 2.5-inch coated deck screws every 6 inches around the perimeter.
6 Feather the seam with a polymer-modified patching compound (e.g. Custom Building Products All-Purpose Patch) so the surface is perfectly level for the new floor.
DIY material cost: approximately $1.50–$3.50 per sq ft (a 4×8 sheet of 3/4-inch exterior plywood costs around $21). Contractor labour runs $2–$10 per sq ft depending on complexity and whether plumbing fixtures need to be moved.
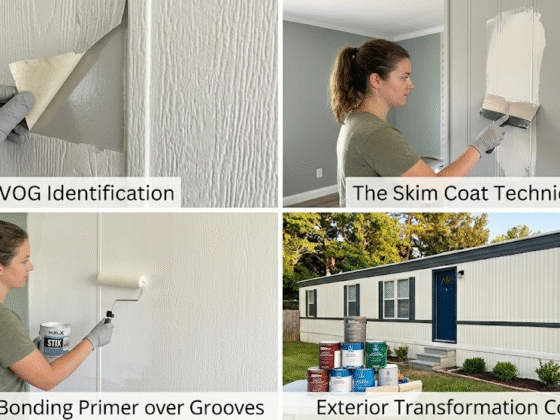
📖 Updating your walls at the same time? How to Paint Mobile Home Walls Without Peeling — the right primer and paint for VOG panels so the finish actually holds.
Cost breakdown — what a full mobile home flooring replacement costs
Here is the complete picture for 2026 material and installation costs. DIY figures assume click-lock floating installation which is achievable for most homeowners over a weekend.
| Flooring Type | Material (low–mid per sq ft) | Single-wide ~900 sq ft (DIY materials) | Double-wide ~1,500 sq ft (DIY materials) | Pro install adds (per sq ft) |
|---|---|---|---|---|
| LVP | $2.00–$3.50 | $1,800–$3,150 | $3,000–$5,250 | $1.50–$3.00 |
| Sheet Vinyl | $1.00–$2.00 | $900–$1,800 | $1,500–$3,000 | $1.00–$2.00 |
| Engineered Hardwood | $4.00–$7.00 | $3,600–$6,300 | $6,000–$10,500 | $2.50–$5.00 |
| Laminate | $1.50–$3.00 | $1,350–$2,700 | $2,250–$4,500 | $1.50–$3.00 |
| Peel-and-Stick Tiles | $0.50–$1.00 | $450–$900 | $750–$1,500 | N/A (DIY only) |
Don’t forget underlayment. Standard foam underlayment: $0.30–$0.50 per sq ft. Premium acoustic and vapour barrier underlayment (recommended for mobile homes): $0.60–$1.20 per sq ft. Budget for this separately on top of your flooring material cost.
DIY saves $1,350–$4,500 on a full single-wide installation compared to hiring a contractor, and $2,250–$7,500 on a double-wide — just by doing the click-lock installation yourself over a weekend.
✅ Government funding: If subfloor damage is extensive, the USDA Standard and Limited Renovation Loan allows eligible rural homeowners to finance up to $75,000 for non-structural repairs including flooring. The HUD Title I Property Improvement Loan provides up to $7,500 in unsecured financing for manufactured home repairs. Both are worth exploring before delaying a necessary fix.
Mobile Home Flooring Cost Calculator
Get a real estimate for your project — materials, installation, and subfloor repair included.
Best affordable products for mobile home flooring
These products are specifically chosen for manufactured home compatibility — floating installation, moisture resistance, and flexibility under chassis movement. Replace the product names below with your Levanta affiliate links before publishing.
This post contains affiliate links. We may earn a small commission if you purchase through our links — at no extra cost to you. We only recommend products we have researched for mobile home compatibility.
| Category | Product to Search | Approx. Price | Why It Works in Mobile Homes | Rating |
|---|---|---|---|---|
| Best LVP | Lifeproof Sterling Oak 6 MIL Rigid Core LVP | ~$2.49/sq ft | Floating SPC rigid core bridges subfloor imperfections and expands independently of the steel chassis. Pre-attached underlayment includes vapour barrier. 100% waterproof. | ⭐ 4.5/5 |
| Best Sheet Vinyl | Mannington Sobella LVS Platinum Series | $2.00–$3.50/sq ft | Fiberglass core allows loose-lay over existing floors. Microban surface protection and ScratchResist finish. Extremely dimensionally stable — no adhesive shear failure risk. | ⭐ 4.6/5 |
| Moisture Barrier Underlayment | Floorlot Premium Underlayment with Vapour Barrier | $0.60–$0.80/sq ft | 3-in-1 acoustic, thermal, and moisture barrier with 6-mil polyethylene film. Blocks upward vapour diffusion from the underbelly that destroys LVP and laminate from below. | ⭐ 4.7/5 |
| Subfloor Patch Compound | Custom Building Products All-Purpose Patch | ~$25 per 25lb bag | Polymer-modified, fast-setting cement compound. Sets in 60–90 minutes. Essential for feathering the height difference between a new plywood patch and the existing swollen subfloor. | ⭐ 4.7/5 |
| Bonus — Transition Strips | Schluter RENO-T Transition Profiles | $15–$30 each | Mandatory for double-wides — bridges the expansion gap across the marriage line, allowing both floor halves to expand independently without buckling into each other. | ⭐ 4.8/5 |
Frequently asked questions
What is the most popular flooring in mobile homes?
Luxury Vinyl Plank (LVP) is currently the most popular flooring choice for manufactured homes, having largely replaced sheet vinyl and laminate over the past decade. Its combination of 100% waterproofing, floating installation that handles chassis flex, and realistic wood-look aesthetics makes it the best all-round solution. Sheet vinyl remains a strong second choice specifically in kitchens and bathrooms where its seamless surface eliminates all moisture entry points at joints — a critical advantage over any planked or tiled floor in high-moisture rooms.
Can you put hardwood floors in a mobile home?
You can install engineered hardwood — but not solid hardwood. Solid 3/4-inch hardwood is too reactive to the moisture dynamics of a manufactured home. Moisture from the underbelly migrates upward through the subfloor and enters the underside of solid wood planks. When the wood’s moisture content exceeds 12%, it begins to warp, cup, and buckle irreversibly. Engineered hardwood — a real wood veneer over a multi-layer plywood core — has far better dimensional stability. It must always be installed as a floating floor, never nailed or stapled down, and must be kept out of bathrooms and kitchens entirely.
How do you replace flooring in a mobile home without removing walls?
Most floating floor installations — LVP, laminate, and engineered hardwood — can be completed without removing walls. Install up to the baseboard trim and cover the expansion gap with quarter-round moulding nailed to the baseboard, not to the floor. The floor must move freely underneath. The one scenario where wall removal might be considered is if the existing flooring runs underneath the bottom plates, which occasionally occurs in older manufactured homes. In that case, cut the existing flooring flush with the wall using an oscillating multi-tool rather than removing the wall, then install the new floor from that cut line.
What thickness LVP is best for mobile homes?
For mobile homes, choose LVP with a minimum total thickness of 6mm — though 8mm is the recommended standard for manufactured housing. Thinner LVP telegraphs subfloor imperfections and sounds hollow underfoot. More importantly, focus on the wear layer thickness: 6-mil is the minimum, 12-mil is the standard for most rooms, and 20-mil is worth the upgrade in kitchens and hallways that see constant foot traffic. The wear layer is what determines the real lifespan of the floor and protects against scratching — it matters more than total plank thickness when comparing products.
Ready to start? Inspect your subfloor first — that single step will save you from the most expensive mistake mobile home renovators make. Once you know what you are working with, LVP is the safest and most durable choice for most rooms, and sheet vinyl remains unbeatable value in wet areas at any budget level.
📖 Planning a full home refresh alongside your floors? Mobile Home Remodel Ideas on a Budget: A Room-by-Room Guide
📖 Updating your walls at the same time? How to Paint Mobile Home Walls Without Peeling

2 comments