A leaking mobile home roof is not a “deal with it later” problem. Water gets into the wall studs, rots the particleboard subfloor, and destroys the ceiling panels fast — often within a single rainy season. The longer you wait, the more expensive the fix.
The good news: most mobile home roof repairs are genuinely doable as a weekend DIY project. The bad news: the techniques are completely different from a standard house roof. Mobile home roofs are lighter, flatter, made from different materials, and governed by different rules. A repair done with the wrong product or the wrong method often makes things worse.
This guide covers every mobile home roof type, the exact products that work, the step-by-step repair process for each, and the warning signs that tell you when DIY is no longer enough. Whether you’re dealing with a small leak, separated seams, or a full coating job — this is the guide you need.
- Emergency: Stop the Leak Right Now
- Safety Rules Before You Get on the Roof
- Identify Your Roof Type
- Signs Your Roof Needs Repair
- Tools & Materials Checklist
- Repairing a Metal Roof
- Repairing EPDM / Rubber Membrane
- Repairing Shingle Roofs
- Roof Coatings: The Long-Term Fix
- DIY vs. Pro Cost Breakdown
- Common Mistakes to Avoid
- Frequently Asked Questions
Emergency: Stop the Leak Right Now
If it’s actively raining and water is coming in, here’s what to do before anything else. Permanent repairs require dry weather and a dry surface — this is your temporary fix to stop the damage spreading.
🚨 Emergency Leak Protocol
- Get a tarp over the roof — use a heavy-duty poly tarp that extends at least 4 feet past the leak area on all sides. Secure with sandbags or bungee cords looped under the eaves. Do NOT nail it down.
- Inside the home — contain the water — place buckets under drips and use towels to prevent water from spreading to walls and subfloor. Wet particleboard subfloor swells and fails fast.
- If you can safely access the roof in dry weather — apply EternaBond tape directly over the leak area as a temporary fix. It bonds immediately and will hold through several rain events while you plan the permanent repair.
- Document everything — photograph the damage inside and outside before touching anything. If you’re filing an insurance claim, you’ll need this evidence. Check what your homeowner’s policy covers.
Safety Rules Before You Get on the Roof
Mobile home roofs are more dangerous to work on than standard house roofs — not because they’re higher, but because the structure beneath you is thinner and may already be compromised by water damage.
Follow these rules every single time you get on the roof:
- Find the truss lines first. From the interior, look for rows of screws in the ceiling panels — those mark the trusses. Or look for the rows of “rumble buttons” (small domed fasteners) running across the roof surface from outside. Walk only on these lines.
- Always use spreader boards. Carry at least two pieces of 1/2″ plywood cut to 2′ × 4′. Place them across the trusses as you move so your weight is distributed across multiple structural members — never concentrated on one point.
- Test for soft spots before each step. Press firmly with your foot before shifting your weight. If the roof feels spongy, springy, or gives at all — that area has rotted decking below. Get off it immediately and approach from a ladder instead.
- Never work on a wet metal roof. Wet metal has virtually zero traction. Even a gentle slope becomes a slide hazard.
- Never work in high winds. Large sheets of membrane or metal can catch air and pull you off the roof.
- Use a fall protection kit on pitched roofs — a basic harness, lanyard, and roof anchor costs around $50–$80 and is not optional if the pitch is steeper than 3:12.
- Extend your ladder 3 feet above the roofline and tie it off to the J-rail or a structural member so it can’t slide sideways when you’re transitioning on and off.
Identify Your Mobile Home Roof Type
Before you buy a single product, you need to know exactly what type of roof you have. The repair materials, products, and techniques are completely different for each. Using the wrong product on the wrong roof is one of the most common and costly mistakes mobile home owners make.
Metal (Galvanized / Aluminum)
Nearly flat or gently bowed. Most common on pre-1990s homes. Screws visible on surface. May have “rumble buttons.”
EPDM / Rubber Membrane
Flat or low-slope. Rubbery black or white surface. Used on roof-over systems and newer manufactured homes.
Asphalt Shingles
Traditional pitched appearance (3:12 or 4:12 slope). Granule surface. Common on post-1990s homes and double-wides.
TPO Membrane
White or light-colored plastic-like surface. Usually a roof-over system. Smooth, heat-welded seams.
| Roof Type | Era / Homes | Primary Failure Mode | Fix Approach |
|---|---|---|---|
| Metal (flat/bowed) | Pre-1990s single-wides | Seam separation, rust, J-rail failure | Butyl tape + lap sealant + elastomeric coating |
| EPDM / Rubber | Roof-over systems, modern | Punctures, edge peeling, UV degradation | EternaBond tape after proper priming |
| Asphalt Shingles | Post-1990s, double-wides | Wind damage, granule loss, flashing failure | Individual shingle replacement + flashing repair |
| TPO | Newer roof-over systems | Seam separation, punctures | TPO-compatible tape + hot air welding (advanced) |
Signs Your Mobile Home Roof Needs Repair
Catch these early and a $150 repair kit fixes it. Miss them and you’re looking at $6,000+ for a full roof replacement.
- Water stains on ceiling panels — the most obvious sign, but remember the stain is rarely directly below the leak entry point
- Bubbling or peeling paint on interior walls or ceiling — moisture is getting into the wall cavity
- Soft or spongy feeling on the roof surface — the decking below has rotted; this is a structural hazard
- Visible rust streaks on metal roofs — surface rust is treatable; through-rust means replacement of that panel
- Separated or cracked seams — on metal roofs, seams are the #1 leak entry point due to thermal expansion and contraction
- J-rail sealant dried out or missing — the J-rail holds the roof skin to the siding. When its sealant fails, water wicks behind the siding and rots wall studs before it ever shows up as a ceiling stain
- Cracked or missing lap sealant around vents, pipes, and skylights — every penetration through the roof is a potential leak point
- “Roof rumble” banging noise in wind — the metal roof skin is lifting and slamming against the trusses; the fasteners have backed out and the roof is no longer secured properly
- Mold or mildew smell inside — moisture has been entering the structure long enough to grow mold. Check your walls for hidden damage as well as the roof
- Daylight visible from the attic/interior — if light gets in, so does water
Tools & Materials Checklist
| Item | Used For | Get It Here |
|---|---|---|
| EternaBond RoofSeal Tape (4″) | Seam repairs, puncture patches on any roof type. MicroSealant bonds at molecular level. | 🛒 Amazon |
| Dicor 501LSW Lap Sealant | Sealing around vents, pipes, J-rail, and all roof penetrations. Industry standard for mobile homes. | 🛒 Amazon |
| Silicone Roof Coating (5 gal) | Full-surface coating for flat/low-slope roofs. Waterproof, UV-resistant, handles ponding water. | 🛒 Amazon |
| Dicor Butyl Seal Tape | Primary gasket under patch panels and around flange edges. Stays flexible permanently. | 🛒 Amazon |
| Rust-Oleum Aluminum Roof Coating | Metal roofs with rust. Excellent adhesion to bare metal, inhibits further corrosion. | 🛒 Amazon |
| Wire brush / angle grinder | Removing rust to bright metal before coating. Critical step — never coat over rust. | Any hardware store |
| Putty knife / scraper | Removing old dried sealant and coating before reapplication | Any hardware store |
| Caulk gun | Applying Dicor lap sealant around penetrations | Any hardware store |
| Hard rubber roller or J-roller | Rolling EternaBond tape to activate MicroSealant bond — do not skip this step | Any hardware store |
| Paint roller (3/8″ nap) + extension pole | Applying roof coating evenly across large surfaces | Any hardware store |
| 2 × 4′ sheets of 1/2″ plywood (× 2) | Spreader boards — distribute your weight across trusses while working | Any hardware store |
| Simple Green or degreaser | Cleaning EPDM rubber surface — must remove carbon black film before patching | Any hardware store |
How to Repair a Mobile Home Metal Roof
Metal is the most common roof type on older mobile homes and the most DIY-friendly to repair — once you understand why it fails and what actually works. The two main failure points are seams and rust. Both are fixable without a contractor.
Why Metal Roofs Fail
Metal expands and contracts with temperature — sometimes by a significant fraction of an inch daily in hot climates like Arizona or Florida. This constant movement is why standard caulk cracks and falls off. It’s also why screws “back out” over time. Any repair product that isn’t flexible will fail again within 1–2 seasons.
Repairing Seams and Cracks — Step by Step
Clean the Repair Area Completely
This is the most important step. If you skip it, your repair will peel off in months.
- Scrape off all old caulk, cracked sealant, and loose coating with a putty knife
- Use a wire brush to remove rust down to bright metal — do not leave any rust under your repair
- Wipe the entire area with a clean rag and allow to dry completely — no moisture under the patch
Apply EternaBond Tape Over the Seam
- Cut EternaBond tape to length — overlap the damaged area by at least 3 inches on each end
- Peel the backing and lay the tape centered over the seam or crack
- Use a hard rubber roller or J-roller to press from the center outward with firm, even pressure — this activates the MicroSealant bond. Do not skip the roller. Finger pressure alone is not enough.
- For extra protection on the leading edge (the uphill side), apply a bead of Dicor 501LSW Lap Sealant along the tape edge to prevent water from working underneath
Reseal All Roof Penetrations
Every vent, pipe, screw head, and roof jack is a potential leak. While you’re up there, reseal all of them.
- Remove all old cracked sealant from around vents and pipe collars with a putty knife
- Apply a fresh, generous bead of Dicor 501LSW Lap Sealant around every penetration — tool it smooth with a wet finger
- Apply a small dab of Dicor over each exposed screw head — backed-out or rusted screws are a major leak source
Reseal the J-Rail
The J-rail is the metal trim that joins the roof skin to the exterior siding along the edges. It is the #1 hidden leak point on older mobile homes — water wicks behind it and rots wall studs without ever showing as a ceiling stain.
- Run your putty knife along the J-rail to check for gaps or dried sealant
- Clean the old sealant completely
- Apply a continuous bead of Dicor Lap Sealant along the entire top edge of the J-rail on all four sides of the home
- Don’t forget the corners — they open up first
Apply Rust-Inhibiting Coating to Rusted Areas
Once all structural repairs are done, treat any remaining rust before it spreads.
- Sand or wire-brush any rusty spots to bright metal
- Apply Rust-Oleum Aluminum Roof Coating to the treated areas — brush it on generously
- Allow to cure per manufacturer instructions before applying a full roof coating over the top
How to Repair an EPDM / Rubber Membrane Roof
EPDM (ethylene propylene diene monomer) is the black rubber membrane used on many roof-over systems. Repairing it correctly requires understanding one critical fact: aged EPDM develops a carbon black film on the surface that acts as a release agent — it will prevent anything from sticking unless you remove it first.
Achieve the “Squeaky Clean” Standard
- Scrub the repair area with Simple Green or a dedicated EPDM cleaner and a stiff brush
- The test: wipe your clean hand across the surface. If it comes away black, it’s not clean enough yet. Keep scrubbing.
- The surface must come away with zero black residue before you proceed
- Allow to dry completely — minimum 30 minutes in direct sun
Apply EPDM Primer
- Brush EPDM-specific primer onto the cleaned area in a thin, even coat
- The primer “opens the pores” of the rubber membrane for a chemical bond
- Wait for the primer to become tacky — the “finger push” test. Touch lightly with a knuckle; it should feel slightly sticky but not transfer to your skin
- Do not let the primer dry completely before applying the patch
Apply EternaBond Tape Over the Damage
- Cut EternaBond to size — overlap all edges of the damage by a minimum of 3 inches
- Peel and position carefully — it bonds on contact and is not repositionable
- Use a hard rubber roller with firm pressure from center outward to activate the MicroSealant
- For repairs in areas prone to standing water, apply a bead of Dicor Lap Sealant along the leading (uphill) edge of the tape
Reseal All Edges and Penetrations
- Check the termination bars (metal strips holding the membrane edge) — reseal any gaps with Dicor Lap Sealant
- Apply fresh sealant around all vents, pipes, and penetrations
- Inspect the seams where membrane sections overlap — press any lifted edges and reseal with Dicor
How to Repair a Shingle Roof on a Mobile Home
Newer manufactured homes with a traditional pitched roof use asphalt shingles — the most familiar roof type, but with one critical mobile home-specific rule you must follow.
Replacing Individual Damaged Shingles
Break the Sealant Bond on Surrounding Shingles
- Use a putty knife to carefully lift the tabs of the shingles in the two rows above the damaged shingle
- Work slowly — older shingles are brittle and crack easily, especially in cold weather
- Place a scrap of plywood under your pry bar to distribute pressure and prevent cracking the shingles above
Remove the Damaged Shingle
- Slide a pry bar under the damaged shingle to pop the roofing nails
- Remove the shingle and inspect the decking below — if it’s soft or discolored, you have a moisture problem that needs addressing before you re-shingle
- Seal any holes left in the decking with roof cement before proceeding
Install and Seal the New Shingle
- Slide the new shingle into position — it must be flush with the adjacent shingle tabs on both sides
- Nail it in place with roofing nails at the same positions as the original fasteners
- Apply a small dab of roofing cement under the tab of the new shingle and the tabs of the shingles directly above it
- Press the tabs flat and hold for 30 seconds to activate the seal
Repairing Flashing Around Chimneys and Vents
On shingle roofs, most leaks originate at flashing — the metal strips where the roof meets a vertical surface like a vent pipe or chimney. If you see a ceiling stain near a vent on a shingle roof, check the flashing before replacing any shingles.
- Peel back the shingles overlapping the flashing
- Remove old roofing cement from around the flashing edges
- Apply fresh roofing cement or Dicor Lap Sealant under and over the flashing edges
- Re-lay and re-nail the overlapping shingles and apply cement under their tabs
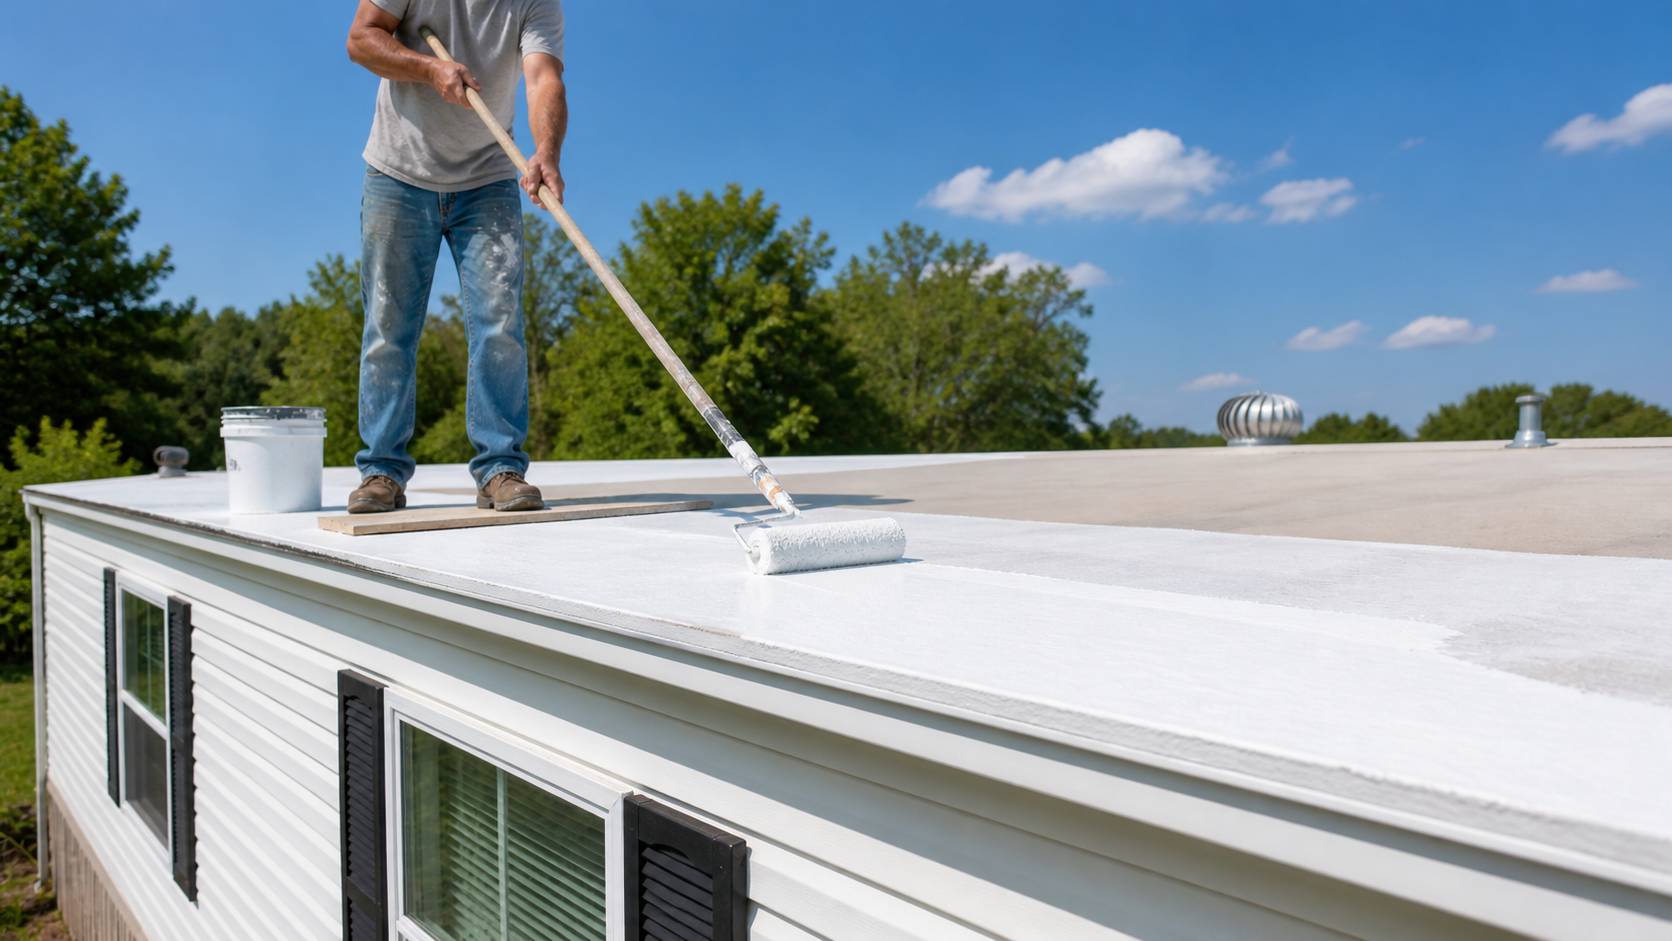
Roof Coatings: The Long-Term Protective Fix
A roof coating is not a repair — it’s a protective layer that seals small cracks and pinholes, reduces thermal stress, and can cut your summer cooling bills by up to 30%. Apply it after all structural repairs (seams, patches, sealant) are complete. Coating over an active leak will not stop it.
Choosing the Right Coating
| Coating Type | Best For | Pros | Cons | Est. Price (5 gal) |
|---|---|---|---|---|
| White Silicone | Flat / low-slope roofs, ponding water areas | Fully waterproof, handles standing water, excellent UV resistance | Nothing bonds to cured silicone later — not even more silicone | $300–$350 |
| White Elastomeric (Acrylic) | Metal roofs, sloped roofs | Breathable, easy cleanup, good for sloped drainage | Water-based — can wash off in standing water areas | $75–$130 |
| Aluminum Coating | Metal roofs with rust | Excellent rust inhibition, good adhesion to bare metal | Lower reflectivity than white, attracts dust over time | $45–$60 |
How to Apply Roof Coating — Step by Step
Complete All Structural Repairs First
Seam tape, penetration sealant, rust treatment, J-rail resealing — all of this must be done and fully cured before you apply coating. Coating is the last step, not a shortcut around the steps above.
Clean the Entire Roof Surface
- Pressure wash or scrub the entire surface with a stiff brush and water to remove dirt, algae, and loose old coating
- Allow to dry fully — coating applied over even slightly damp metal will trap moisture and blister
- Check the weather: you need at least 24 hours of dry weather after application for the coating to cure
Apply Coating in Two Coats
- Use a 3/8″ nap roller on an extension pole for large flat areas — work in sections across the roof
- Apply the first coat at the recommended coverage rate per the label (typically 1 gallon per 50–100 sq ft)
- Allow the first coat to dry fully — usually 4–6 hours in warm sun
- Apply the second coat perpendicular to the first — this ensures even coverage and eliminates thin spots
- Pay extra attention to seams, around patches, and near the J-rail — apply coating a bit thicker in these areas
Energy Savings: The White Coating Bonus
A white elastomeric or silicone coating reflects up to 85% of solar radiation. By keeping the roof surface temperature significantly lower, it reduces the thermal cycling that causes seams to fail — and slashes your cooling costs. Many homeowners in Thermal Zone 1 (Florida, Texas, Louisiana) report a 25–30% drop in summer energy bills after applying a white roof coating. If you’re also insulating your mobile home, a white roof coating paired with proper insulation is the most cost-effective energy upgrade you can make.
Section 10DIY vs. Hiring a Pro: 2025–2026 Cost Breakdown
| Project | DIY Cost | Pro Cost | Your Savings |
|---|---|---|---|
| Full roof coating — double-wide | $400 – $800 | $1,500 – $3,000 | $1,100+ |
| Seam resealing + tape repairs | $150 – $300 | $600 – $1,200 | $450+ |
| Vent / boot replacement | $50 – $100 | $300 – $500 | $250+ |
| EPDM patch repair | $100 – $250 | $500 – $800 | $400+ |
| Full metal roof-over (TPO) | Not recommended DIY | $6,000 – $11,000 | — |
| Seam + penetration + full coat (typical DIY job) | $600 – $1,100 | $2,500 – $5,000 | $1,900+ |
When to hire a pro instead of DIYing:
- The roof decking or trusses are structurally compromised (soft, sagging, visibly rotted)
- You find extensive mold inside the home after the leak — this indicates long-term moisture intrusion requiring full structural assessment
- The entire roof system needs replacement rather than repair — full roof-overs require professional installation to maintain structural integrity
- You’re uncomfortable working at height or the pitch is too steep for safe DIY access
A roof issue left unaddressed long enough always becomes a wall issue. See our mobile home wall repair guide and the full mobile home remodel cost guide to understand the full picture if water has already reached your walls or floors.
Section 11Common Mistakes to Avoid
Coating Over an Active Leak
A roof coating is a protective skin, not a structural repair. Applying it over an open seam or crack seals moisture inside the structure, accelerating rot from the inside out. Fix all leaks and let everything dry fully before coating.
Using Standard Silicone Caulk
Once standard silicone cures, nothing bonds to it — not more silicone, not roof coating, not tape. You’ll never be able to apply a coating over a silicone-repaired area. Always use Dicor Lap Sealant or a butyl-based product. They stay flexible and remain compatible with future coatings.
Skipping Surface Preparation
Adhesion is everything. Old caulk, rust, carbon black film on EPDM, and surface oxidation all prevent new products from bonding. A patch or coating applied to an unprepared surface will peel within one season. Clean down to bare, dry material before any repair.
Adding a Second Layer of Shingles
On site-built homes this is common practice. On a mobile home, a second layer adds 3,600–4,800 lbs to a truss system not designed for it. This causes structural sagging, ceiling panel failure, and wall misalignment. Always remove the old layer first.
Walking Between the Truss Lines
The roof skin is not structural. Stepping between trusses — especially on a damaged or wet-weakened area — can send you straight through the ceiling. Walk only on truss lines and always use spreader boards.
Forgetting the J-Rail
Most DIYers focus on the obvious leak and ignore the J-rail around the perimeter. Dried-out J-rail sealant is the #1 hidden leak source — water enters behind the siding and rots wall studs silently for months. Always reseal the J-rail while you’re on the roof. Check your walls for hidden moisture damage if the J-rail has been compromised.
Applying Coating in the Wrong Weather
Too hot and the coating dries before it levels, leaving thin spots. Too cold and it won’t cure properly. Apply only when temperatures are between 50°F and 90°F with no rain forecast for 24 hours. Never coat over a surface that was wet in the last 48 hours.
Not Doing Annual Maintenance
A mobile home roof needs a quick inspection every spring and fall — 30 minutes with a ladder and a tube of Dicor can prevent thousands in repair costs. Check seams, penetrations, J-rail, and look for any lifted tape or cracked sealant. Catching a $5 fix before it becomes a $500 repair is the whole game. While you’re winterizing, check the full winterizing checklist to cover the roof alongside other seasonal prep.
Frequently Asked Questions
Start With the Seams and Work Your Way Out
Most mobile home roof repairs follow the same sequence: find the leak, clean the surface completely, repair with EternaBond tape and Dicor Lap Sealant, reseal every penetration and the J-rail, then protect the whole surface with a white coating. Done in that order with the right products, most repairs will hold for 5–10 years.
The two things that cause DIY roof repairs to fail are always the same: wrong products (standard silicone instead of Dicor) and skipped preparation (coating over dirt or rust). Get those right and you’re ahead of 90% of DIYers.
If water has already gotten into your walls or floors, don’t stop at the roof — check our mobile home wall repair guide and consider a full remodel plan to address all the damage at once while you have access.