The most expensive mistake in a mobile home bathroom remodel is ordering standard residential fixtures. A standard tub is 60 inches long. Your mobile home tub is 54×27 inches. A standard toilet rough-in is 12 inches. Yours is likely 10 inches. Order the wrong one and it won’t fit — full stop.
This guide covers every dimension you need to measure before buying anything, three budget tiers from a $500 cosmetic refresh to a $10,000 gut renovation, and the specific products that work in manufactured home bathrooms — with Amazon links for each one.
In this guide
Measure these 4 things before buying a single fixture
Mobile home bathrooms use non-standard dimensions across the board. Getting any one of these wrong means returning fixtures, replanning the entire project, or worse — cutting into walls that shouldn’t be cut. Measure first, order second, always.
| Component | Standard residential | Mobile home standard | What happens if you order wrong |
|---|---|---|---|
| Bathtub length | 60 inches | 54 inches | Will not fit without major wall reframing |
| Bathtub width | 30–32 inches | 27 inches | Too wide — hits opposing wall |
| Toilet rough-in | 12 inches | 10 inches | Tank hits wall — cannot install |
| Wall stud depth | 3.5 inches (2×4) | 2.5 inches (2×3) | Standard recessed cabinets don’t fit |
| Subfloor material | 3/4″ plywood | 5/8″ particleboard | Absorbs moisture — always check for soft spots first |
How to measure toilet rough-in correctly: Measure from the finished wall behind the toilet (not the baseboard — that adds false distance) to the center of the floor bolts on either side of the toilet base. If it’s 10 inches or less, you need a 10-inch rough-in toilet. Measuring from the baseboard is the most common mistake and leads to ordering the wrong unit.
The plumbing runs through the floor, not the walls. In a mobile home, all supply lines and drain pipes come up through the floor because the 2×3 wall studs are too shallow for standard pipe routing. This means moving any fixture — sink, toilet, tub — requires cutting through the subfloor and the belly wrap, then resealing everything to maintain the thermal envelope. Fixture relocation is a professional job. See what happens to the home’s insulation if the belly wrap isn’t resealed: mobile home insulation guide.
3 budget tiers — 2026 costs
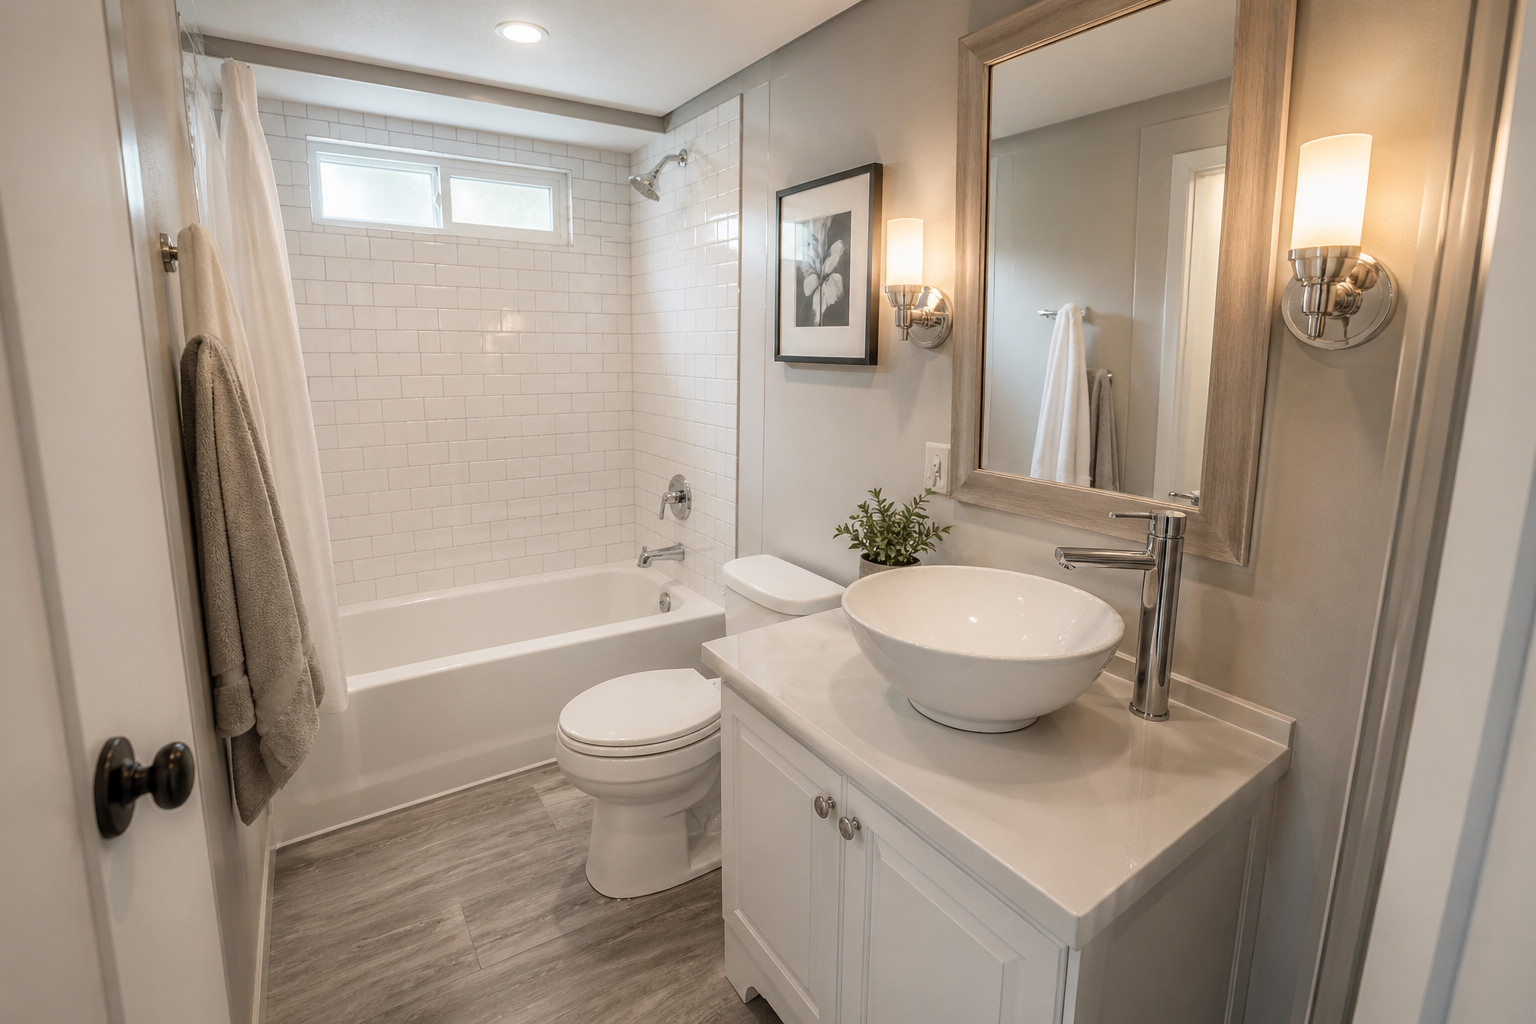
Tub and shower — the most important section
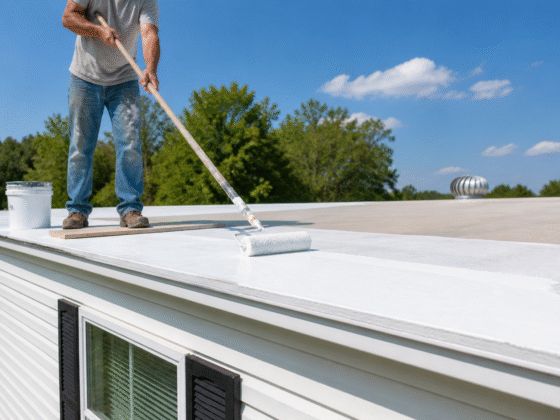
Tub replacement is the most technically demanding phase of any mobile home bathroom remodel. The 54×27 non-standard dimension means you cannot walk into Home Depot and buy a replacement — you need to source from manufactured home suppliers or specialty online retailers. Full kitchen remodel comparison for context: mobile home kitchen remodel guide.
ABS vs fiberglass — which to choose
ABS plastic (~$465)
Lighter, easier to cut for custom drain placement, lower cost. More susceptible to surface scratching over time. Best for budget remodels where the tub won’t be used heavily.
Fiberglass (~$418)
Superior rigidity and longevity. Heavier. Prone to spider-web cracking if subfloor is not perfectly level — always repair soft spots before installing. Best for long-term holds.
3 critical rules before ordering any tub
1. Confirm drain position. Mobile home tubs come in left-hand, right-hand, and center drain configurations. You cannot easily convert between them — the P-trap location is fixed by the floor joists below. Look at your existing drain and order the matching configuration.
2. Order a sectional surround if your door is under 28 inches. Standard mobile home interior doors are 24–28 inches wide. A one-piece tub/shower unit will not fit through these openings — you need a 3-piece or sectional surround kit.
3. Check the surround support. Mobile home tub surrounds rely on the VOG wall panels for backing support. If the walls behind the tub are soft or damp, the surround will pull away from the caulk joint within months. Repair walls first.
Walk-in shower conversion
Converting the 54×27 tub to a walk-in shower is the single highest-impact bathroom upgrade for a manufactured home. Important structural warning: in many mobile homes, removing the bathtub also requires removing an adjacent interior wall that serves as part of the structural assembly. Always probe the wall before demo — if removing it changes how the home feels underfoot or affects door operation, stop and consult a contractor.
| Option | DIY cost | Hired cost | Best for |
|---|---|---|---|
| Prefab shower stall kit (mobile home sized) | $400–$900 | $1,500–$3,000 | Budget Tier 2 conversion |
| Tile shower on new cement board | $800–$2,000 | $3,000–$7,000 | Premium Tier 3 finish |
| Frameless glass doors | $400–$1,200 add-on | $800–$2,000 add-on | Doubles perceived bathroom size |
Toilet replacement — the rough-in trap
The steel I-beam chassis forces drain pipes to a closer position relative to the wall — hence the 10-inch rough-in. Installing a standard 12-inch toilet means the tank hits the wall and cannot be fully seated. Installing a 10-inch toilet in a 12-inch space leaves a 2-inch gap behind the tank that creates stress on the floor flange over time.
Recommended 10-inch rough-in toilets (2026)
Glacier Bay N2428R-10 — budget pick
Dual flush, WaterSense certified, 10-inch rough-in. Best value entry point. ~$189.
American Standard Cadet 10-inch
Antimicrobial surface, slow-close seat, 10-inch rough-in. Mid-range best seller. ~$246.
Kohler Highline Arc 10-inch
Chair height comfort, 1.28 GPF, premium finish options. Best for Tier 3 renovations. ~$239.
Floor flange warning: Mobile home toilets connect to a plastic ABS floor flange solvent-welded to the waste line. If the flange is cracked or rocking, it must be cut out from below the home — not patched from above. A flange repair ring is a temporary fix that fails quickly in the flexible mobile home environment. If you find a rocking flange, budget for a proper repair before installing the new toilet.
Use a waxless toilet gasket — not a wax ring
Mobile home drain lines shift seasonally with chassis movement. A foam or rubber waxless gasket accommodates this movement without breaking the seal — standard wax rings compress and fail in flexible floor environments. The Smart Fit or Sani Seal brand waxless gaskets are the 2026 standard for manufactured homes.
Bathroom flooring — why ceramic tile always cracks
Ceramic tile is the single worst flooring choice for a mobile home bathroom. The steel chassis flexes with temperature changes, and ceramic tile cannot flex — grout lines crack within one to two thermal cycles. LVP is the correct material: 100% waterproof, floating install that moves with the chassis, and completely compatible with the particleboard subfloor when installed correctly. Full flooring comparison: best flooring for mobile homes.
| Material | 2026 cost/sq ft | Mobile home verdict |
|---|---|---|
| Waterproof LVP (click-lock) | $2.00–$4.00 | Best choice — flexible, 100% waterproof |
| Sheet vinyl | $1.50–$3.00 | Budget option — seamless is best, hard to DIY |
| Peel-and-stick vinyl tiles | $0.80–$2.00 | Only over perfectly sound existing floor |
| Ceramic or porcelain tile | $6.00–$12.00 | Not recommended — cracks at grout lines with chassis flex |
Soft spot repair — do this before any floor install
Press firmly with your thumb across every square foot of the bathroom floor. Any spongy or springy area is compromised particleboard — must be replaced, not covered over
Cut out the damaged section with a circular saw set to exactly the subfloor thickness — 5/8 inch for particleboard (don’t go deeper or you’ll hit joists and plumbing)
Inspect joists for rot — “sister” any damaged joist with a new 2×6 attached alongside it before closing the floor
Replace with 3/4-inch exterior-grade plywood — all seams must land on a joist or a 2×4 blocking support installed between joists
Double wide marriage line: In a two-section home the marriage line runs through the bathroom in many floor plans. LVP planks must have a T-molding transition strip at the marriage line — never run continuous planks across it. The two sections move independently and continuous planks buckle and gap. See: double wide mobile home interior guide.
Ventilation — the most neglected bathroom upgrade
Poor ventilation destroys mobile home bathrooms faster than any other single factor. A hot shower raises a 40 sq ft bathroom to 100% humidity in under 3 minutes. Without mechanical exhaust that moisture condenses on VOG walls, delaminating the vinyl surface and growing mold behind it. HUD Code §3280.103 requires a minimum 50 CFM exhaust fan vented directly to the exterior — not into the ceiling cavity, not into the wall system.
Critical installation warning: The fan must exhaust directly to the exterior — never into the space between the ceiling and the metal roof. Venting into that cavity causes the metal roof to rust from the inside out within a few seasons. Many original mobile home fans vent incorrectly into this space.
2026 recommended exhaust fans
Panasonic WhisperFit DC 110 CFM — best overall
Humidity sensor, slim-fit housing for 2×6 joists, DC motor runs 20 years without maintenance. $177. Industry standard for manufactured home retrofits in 2026.
ReVent RVLH80 — easiest DIY install
80 CFM with humidity sensor. “Roomside” installation — no attic or roof cavity access required. Perfect for mobile home retrofits. ~$155.
Affiliate links — we may earn a small commission at no extra cost to you.
Storage solutions for tiny mobile home bathrooms
The 2×3 wall studs limit you to 2.5 inches of depth — standard recessed medicine cabinets (which need 4 inches) will not fit without hitting the exterior sheathing. Every storage solution below works within the 2×3 constraint. For organizing small spaces throughout the home: 47 organization hacks for small spaces.
Slimline recessed medicine cabinet (3-inch depth)
Only 3 inches total depth — fits natively in a 2×3 wall cavity. The Mobile Home Parts Store #460201 ($57.99) is one of the few that works. Must anchor into studs — never into VOG alone.
Over-toilet storage cabinet — freestanding
Walsunny over-toilet cabinet with adjustable shelving and closed doors ($64.99). Vertical dead space above the toilet is the most underused storage zone in any mobile home bathroom. No wall anchoring required.
Floating corner shelves
Bamboo or moisture-resistant MDF. Mount into 2×3 studs using a stud finder first — toggle bolts into VOG alone will pull out under any load. Corner placement avoids the stud-depth limitation entirely.
Affiliate links — we may earn a small commission at no extra cost to you.
Frequently asked questions
How much does it cost to remodel a mobile home bathroom?
A cosmetic refresh (epoxy tub, new faucet, mirror, peel-and-stick floor) runs $300–$600 DIY or $1,500–$4,000 hired. A mid-range surface replacement with new 54×27 tub, 10-inch rough-in toilet, and LVP flooring runs $1,500–$3,000 DIY or $5,000–$10,000 hired. A full gut renovation with walk-in shower, subfloor replacement, and tile work runs $10,000–$17,600+ professionally installed. Labor accounts for 40–65% of Tier 3 costs. Full cost context: mobile home remodel cost guide.
Can you replace a tub in a mobile home?
Yes — but you must use a mobile-home-specific 54×27-inch replacement tub, not a standard 60-inch residential unit. The replacement must also match the existing drain configuration (left, right, or center drain) since the P-trap location is fixed by the floor joists below. One-piece tub/shower units won’t fit through most mobile home interior doors — order a 3-piece sectional surround instead. Source from manufactured home suppliers or specialty online retailers rather than big-box stores.
What size tub fits in a mobile home?
The standard mobile home tub is 54 inches long by 27 inches wide. This is significantly smaller than the 60×32-inch standard residential alcove tub. Installing a standard 60-inch tub requires relocating interior walls, which often compromises structural elements including the load-bearing marriage wall in double wide homes. Always measure your existing tub alcove before ordering any replacement.
How do you tile a mobile home bathroom?
Tiling over VOG walls requires the correct preparation sequence: scuff-sand the vinyl surface with 60-grit paper to create mechanical adhesion, apply a specialty bonding primer (KILZ Adhesion or Henry 336), then use a polymer-modified flexible thinset (Custom Building Products VersaBond Flex or similar — ANSI A118.11 or A118.15 rated) rather than standard mastic. The flexible thinset accommodates the chassis movement that would crack rigid mastic. Use unsanded grout for grout lines under 1/8 inch. For wall painting instead of tiling: how to paint mobile home walls without peeling.
Can you put a walk-in shower in a mobile home?
Yes — and it’s the single highest-impact bathroom upgrade for a manufactured home. The conversion costs $1,500–$4,000 DIY or $4,000–$9,000 hired. The critical warning: in many mobile homes, removing the tub requires removing an adjacent interior wall that may be structural. Always probe the wall and check if door alignment changes before starting demo. Prefab shower stall kits sized for mobile home alcoves are the simplest installation path. Frameless glass doors double the perceived bathroom size.
What flooring is best for a mobile home bathroom?
Waterproof luxury vinyl plank (LVP) with a click-lock floating installation is the correct choice. It’s 100% waterproof, flexible enough to handle chassis movement without cracking, and installs without adhesive to the particleboard subfloor. Ceramic tile is the worst choice — it cannot flex with the chassis and cracks at grout lines within one to two thermal cycles. Always install LVP as a floating floor with a 1/4-inch expansion gap at all walls and at the marriage line in double wide homes.
How do you fix a soft floor around a toilet in a mobile home?
A soft floor around the toilet indicates water damage to the particleboard subfloor — most commonly from a failed wax ring seal or slow toilet base leak. Remove the toilet first. Cut out the damaged section with a circular saw set to the exact subfloor thickness (typically 5/8 inch). Inspect the joists underneath for rot — sister any damaged joist with new lumber. Replace with 3/4-inch exterior-grade plywood with seams landing on joists or blocking. Use a waxless gasket when reinstalling the toilet to prevent the problem from recurring with seasonal floor movement.
More mobile home remodel guides
The bathroom is the highest-risk room for moisture damage in any manufactured home. Get the ventilation and subfloor right first — every surface upgrade on top lasts decades longer.