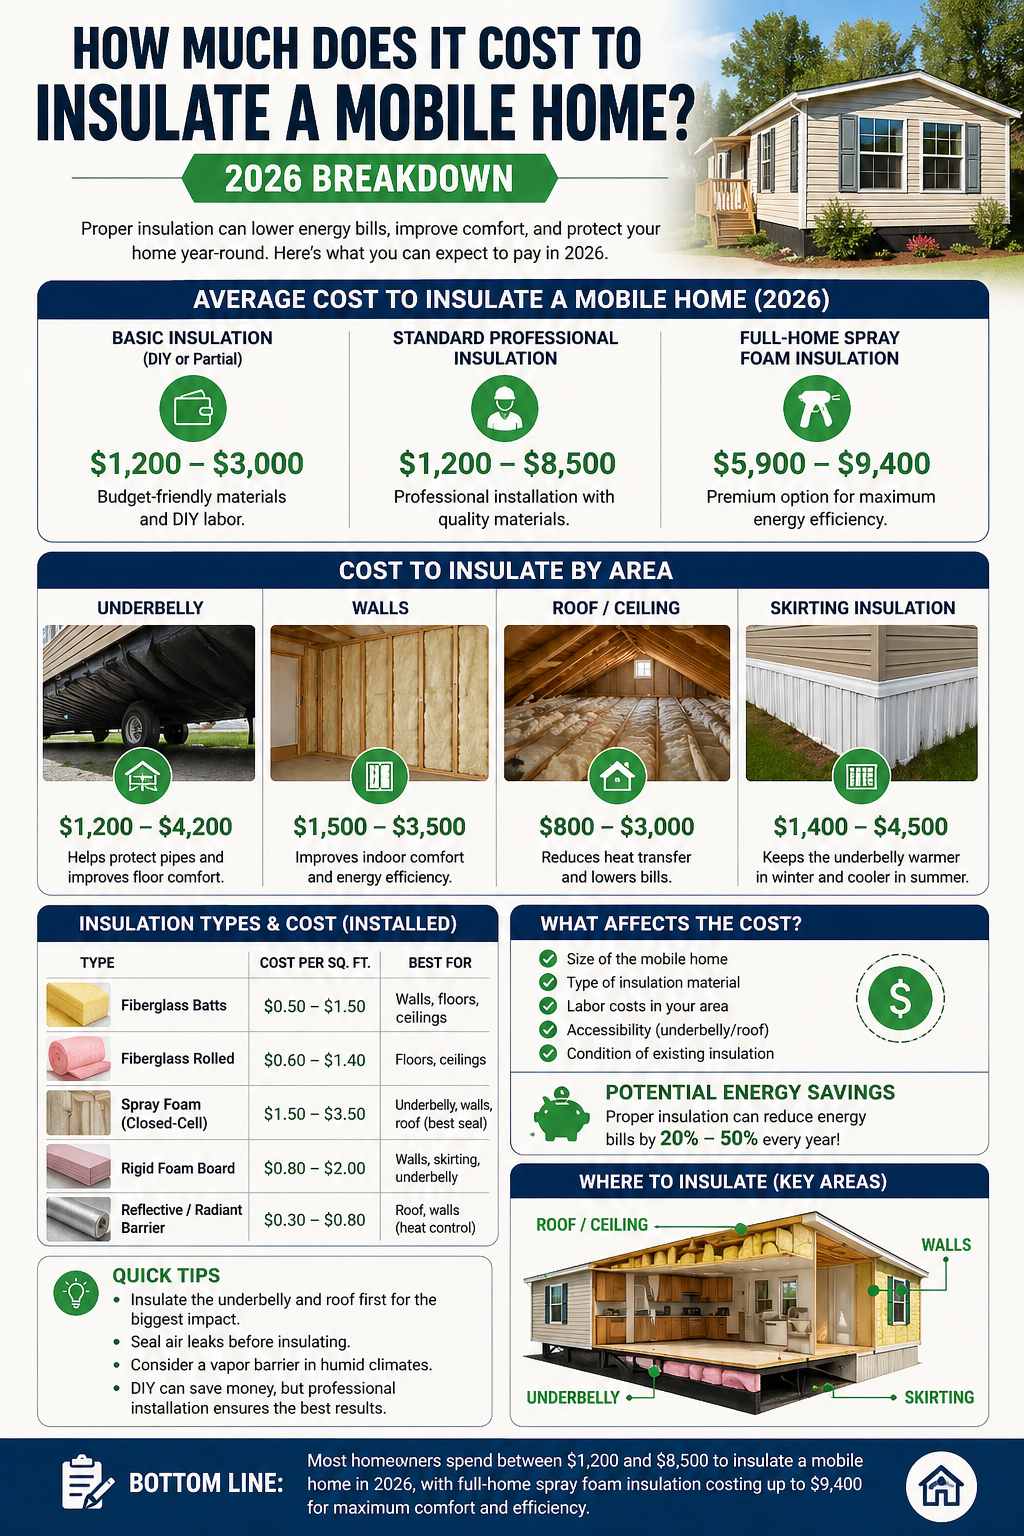
The short answer: a complete DIY insulation upgrade for a 1,000 sq ft single wide runs $2,500–$4,500 in materials. The underbelly alone — the single most impactful zone — costs around $1,500. But the real number depends on your HUD thermal zone, your home size, which areas you’re upgrading, and whether you’re doing it yourself or hiring out.
This guide breaks down every zone with real 2026 material costs, payback periods, and a free calculator so you can build your actual estimate before spending a dollar.
In this guide
Free mobile home insulation cost calculator
Select your HUD zone, home size, and which areas you’re insulating to get a real DIY vs professional estimate for your specific situation.
HUD thermal zone
Square footage: 1,000 sq ft
Home type
Select areas to insulate
HUD thermal zones — why yours matters for cost
Your HUD thermal zone determines what R-values you need and therefore what materials and quantities you need to buy. A Zone 3 home needs nearly double the insulation of a Zone 1 home — so costs differ significantly. Check your HUD data plate (inside a closet, cabinet door, or near the electrical panel) to confirm your home’s zone designation. Full technical detail: how to insulate a mobile home.
| Zone | Region | Floor min. | Wall min. | Ceiling min. | Typical DIY cost (1,000 sq ft) |
|---|---|---|---|---|---|
| Zone 1 | Gulf states, FL, TX, HI | R-13 | R-13 | R-30 | $1,800–$3,000 |
| Zone 2 | Mid-Atlantic, Midwest, Pacific NW | R-19 | R-21 | R-30 | $2,500–$4,500 |
| Zone 3 | Northern states, high altitude | R-30 | R-21 | R-38 | $3,500–$6,000 |
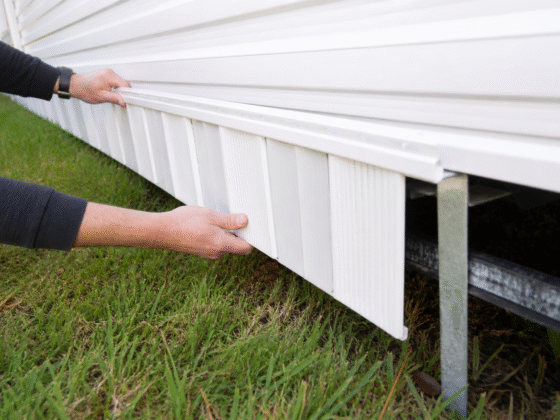
Underbelly insulation cost — do this first
The underbelly is the highest ROI insulation zone in any manufactured home. It protects pipes and ducts from freezing, reduces floor heat loss, and pays back in 3–5 years through energy savings. If your belly wrap is torn, pipes can freeze at 28°F even with your heat running — fixing it is a structural necessity, not a luxury. For the complete installation walkthrough: winterizing a mobile home.
| Material / task | Quantity (1,000 sq ft) | Unit price | Total |
|---|---|---|---|
| Polyethylene belly wrap (100 ft roll) | 1 roll | $250 | $250 |
| Flex-Mend repair tape (4″ × 180′) | 2 rolls | $43 | $86 |
| Owens Corning PINK Next Gen R-19 batts | 10 bags | $85 | $850 |
| 6-mil poly vapor barrier | 2 rolls | $120 | $240 |
| Hammer tacker + staples kit | 1 kit | $60 | $60 |
| Mechanic’s creeper + PPE | 1 set | $100 | $100 |
| Total DIY — 1,000 sq ft single wide | ~$1,586 | ||
| Professional installation — same scope | $2,500–$4,000 | ||
Rockwool Comfortbatt alternative
$1.40–$2.50/sq ft. Hydrophobic, fire-rated, won’t sag. Best for humid climates (Zone 1 Gulf Coast). Costs $400–$600 more than fiberglass but lasts significantly longer in wet conditions.
Closed-cell spray foam
$1.50–$4.50/sq ft professionally applied. Best performance — bonds to joists, acts as its own vapor barrier. Total cost: $4,000–$8,000 for full underbelly. 3-year payback in Zone 3.
Floor insulation cost
Floor insulation sits inside the joist cavities above the belly wrap. The target R-value depends on your zone — R-13 minimum in Zone 1, up to R-30 for Zone 3. The particleboard subfloor challenge: never compress insulation directly against it without a 1-inch air gap, or moisture traps against the wood. This often pairs with a flooring upgrade: best flooring for mobile homes.
| Strategy | R-value | DIY cost/sq ft | Best for |
|---|---|---|---|
| Standard fiberglass batts (6.25″) | R-19 | $0.30–$1.00 | Zone 1/2 dry climates |
| Rockwool Comfortbatt | R-21 | $1.40–$2.50 | All zones, humid climates |
| Rigid XPS (2″) | R-10 | $0.60–$0.90 | High-moisture areas |
| Hybrid: Polyiso 2″ + Rockwool | R-30+ | $2.00–$3.50 | Zone 3 target — best combo |
Floor insulation cost for a 1,000 sq ft single wide: Standard fiberglass batts run $300–$1,000 in materials. Rockwool runs $1,400–$2,500. The Zone 3 hybrid approach runs $2,000–$3,500. Professional installation adds $1,500–$3,000 in labor on top of materials.
Wall insulation cost
Wall insulation is the most constrained and most expensive zone per square foot. The 2×3 stud depth gives you just 2.5 inches of cavity — and you cannot use standard drill-and-blow techniques because belt rails and fragile VOG panels stop you. See what you’re working with in detail: how to fix mobile home walls.
| Method | R-value gain | Cost/sq ft | Disruption |
|---|---|---|---|
| Air sealing only (caulk + foam) | No R-value — stops air leaks | $0.05–$0.15 | None — do this first |
| Interior Polyiso 1″ overlay (DIY) | R-7 added | $1.25–$2.00 | Moderate — reduces room width 1.5″ |
| RetroFoam injection (professional) | R-12 to R-15 | $2.00–$5.00 | Low — small drill holes only |
| Exterior XPS 2″ + new siding | R-18 to R-22 | $3.50–$6.50 | High — best performance, re-siding project |
Wall insulation cost for a 1,000 sq ft single wide: Air sealing runs $50–$150 in materials — do this first regardless of which wall upgrade you choose. Interior Polyiso overlay runs $1,250–$2,000 DIY. Professional RetroFoam injection runs $2,000–$5,000 for a whole home. Exterior XPS + re-siding runs $7,000–$15,000 total.
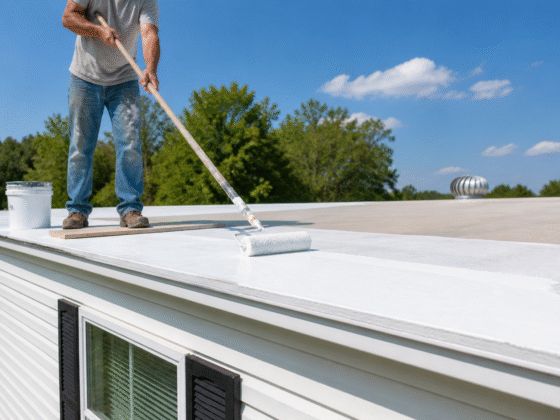
Ceiling and roof insulation cost
Ceiling insulation is the second most impactful zone after the underbelly. Blown-in fiberglass (not cellulose — too heavy for thin ceiling panels) through access holes along the ridge is the standard approach for flat-roof mobile homes. Never fill the cavity solid — always install Durovent baffles first to maintain a 1.5-inch ventilation path at the eaves.
| Upgrade type | DIY cost (1,000 sq ft) | Pro cost | Annual savings | Payback |
|---|---|---|---|---|
| Blown-in fiberglass (apex method) | $600–$1,000 | $1,200–$2,500 | 10–15% | 3–5 years |
| Durovent baffles (required first) | $80–$150 | Included in pro job | Prevents rot | Immediate |
| Polyiso rigid roof-over (2–4″ foam under new metal) | Professional only | $7,000–$13,000 | 25–35% | 8–12 years |
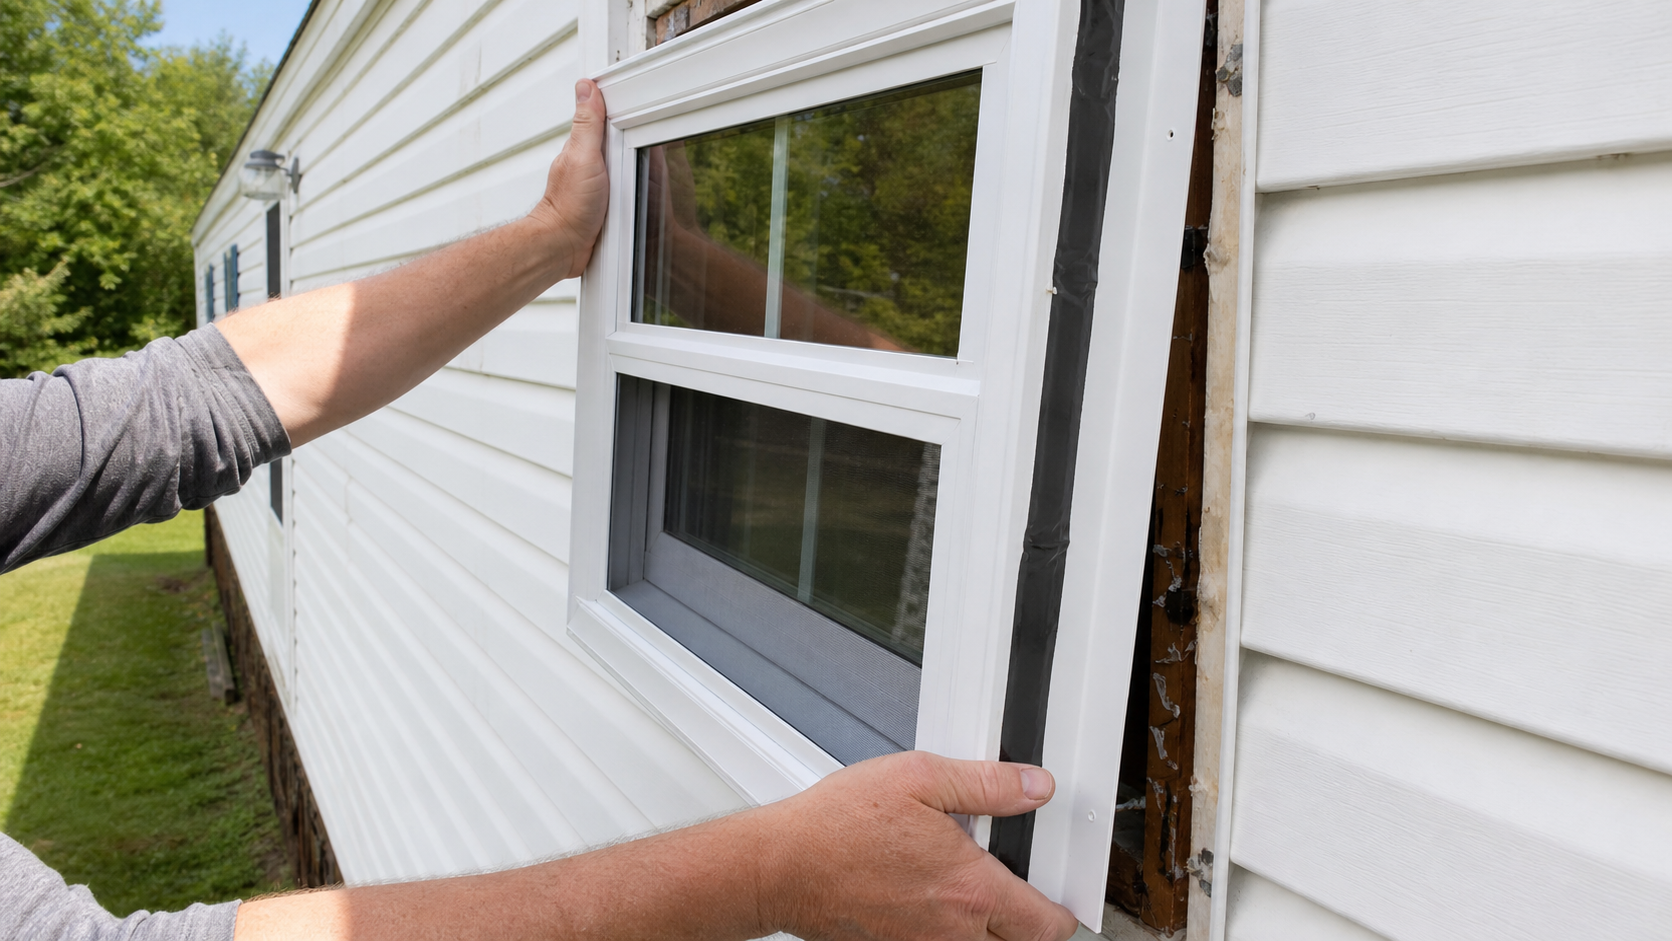
Windows and doors cost — lowest ROI, do last
Single-pane aluminum windows common in older manufactured homes have an R-value of approximately R-1. Full replacement pays back in 12–13 years — the lowest ROI of any insulation upgrade. Start with film kits and weatherstripping. If your home insurance may cover damaged windows, check first: does home insurance cover window replacement.
| Upgrade | Cost | Heat loss reduction | Payback |
|---|---|---|---|
| Window film kit (3M or Duck Brand) | $15–$30 per window | 20–30% | Under 1 year |
| V-strip weatherstripping (per door) | $8–$25 | Stops drafts | Immediate |
| Door sweep (per door) | $12–$25 | Stops floor drafts | Immediate |
| Full window replacement — 10 windows (Kinro Low-E vinyl) | $3,000–$6,000 pro | ~$350/year | 12–13 years |
Where to spend first — the priority order
Adding insulation to one zone while leaving another wide open creates pressure differentials that defeat the upgrade. Always follow this sequence. For the complete technical reasoning behind it: how to insulate a mobile home.
Air sealing — $50–$150
Caulk and foam every penetration, outlet, marriage line gap. Do before any insulation or you trap moist air.
Underbelly + vapor barrier — ~$1,500 DIY
Highest single ROI upgrade. Protects pipes, removes largest radiant heat load.
Ceiling blow-in — $600–$1,000 DIY
Second highest-return zone. Heat rises — ceiling losses are constant year-round.
Insulated skirting — $800–$2,000 DIY
Warms crawl space, reduces chassis thermal bridging. Pairs naturally with leveling work: leveling guide.
Wall insulation — $1,250–$5,000
Most constrained zone. Do during a planned renovation or re-siding project for best efficiency.
Window replacement — $3,000–$6,000
Lowest ROI. Start with film kits ($15–$30 each) until all other zones are addressed.
Frequently asked questions
How much does it cost to insulate a mobile home?
A complete DIY insulation upgrade — underbelly, ceiling blow-in, air sealing, and skirting — for a 1,000 sq ft single wide typically costs $2,500–$4,500 in materials. The underbelly alone runs approximately $1,500. Hiring professionals for the same scope costs $5,000–$9,000. Zone 3 (northern) homes spend 30–40% more than Zone 1 homes to reach the higher target R-values required by colder climates.
Is it worth insulating a mobile home?
Yes — particularly the underbelly and ceiling, which pay back in 3–5 years through energy savings of 10–40%. Beyond energy costs, proper insulation dramatically extends the home’s structural life by reducing condensation that causes subfloor rot and wall failure. In Zone 3 climates, underbelly insulation is also critical for pipe freeze prevention — a failed belly wrap can allow pipes to freeze at 28°F even with heat running. For complete context: how to insulate a mobile home.
What is the cheapest way to insulate a mobile home?
Air sealing is the cheapest and most overlooked upgrade — $50–$150 in caulk and spray foam applied to every penetration, outlet, and marriage line gap. It produces immediate results and amplifies every other insulation upgrade you make afterward. After air sealing, the DIY underbelly batt replacement ($1,500) provides the highest energy savings per dollar of any insulation investment in a manufactured home.
How much does it cost to insulate the underside of a mobile home?
For a 1,000 sq ft single wide, DIY materials run approximately $1,500 — polyethylene belly wrap ($250), Flex-Mend tape ($86), R-19 fiberglass batts ($850), 6-mil vapor barrier ($240), and basic tools ($100). The same job hired out costs $2,500–$4,000. For a 1,400 sq ft double wide, scale these numbers by approximately 1.4× and add 15–20% for the marriage line complexity.
What R-value insulation should a mobile home have?
HUD minimums by zone: Zone 1 (Gulf states) — R-13 floor, R-13 wall, R-30 ceiling. Zone 2 (Mid-Atlantic, Midwest) — R-19 floor, R-21 wall, R-30 ceiling. Zone 3 (northern states) — R-30 floor, R-21 wall, R-38 ceiling. For 2026 high-performance targets, add roughly 10 R-value points to each zone’s floor and ceiling minimums. Many older manufactured homes fall well short of even the minimum requirements — especially pre-1990 units.
Can I insulate a mobile home myself?
Yes — air sealing, underbelly batt replacement, and ceiling blow-in are all DIY-accessible if you’re comfortable working in a crawl space and on a roof. Wall injection foam and spray foam require professional equipment. The DIY savings are significant: approximately 50% compared to hiring contractors. The most important safety note for underbelly work is to never rely on a hydraulic jack alone as support — always use secondary blocking before crawling under the home.
Ready to start insulating?
Start with air sealing this weekend — $50 in caulk and foam addresses the biggest energy losses immediately. Then tackle the underbelly when you’re ready for the full project.