Most mobile home insulation guides tell you to “add more insulation” without explaining why the approach used in site-built homes fails completely here. You cannot drill and blow walls the same way — belt rails and brittle VOG panels stop you. You cannot fill the roof cavity solid — you’ll trap moisture and rot the decking. And no amount of ceiling insulation fixes a torn belly wrap that’s dumping cold air onto your pipes.
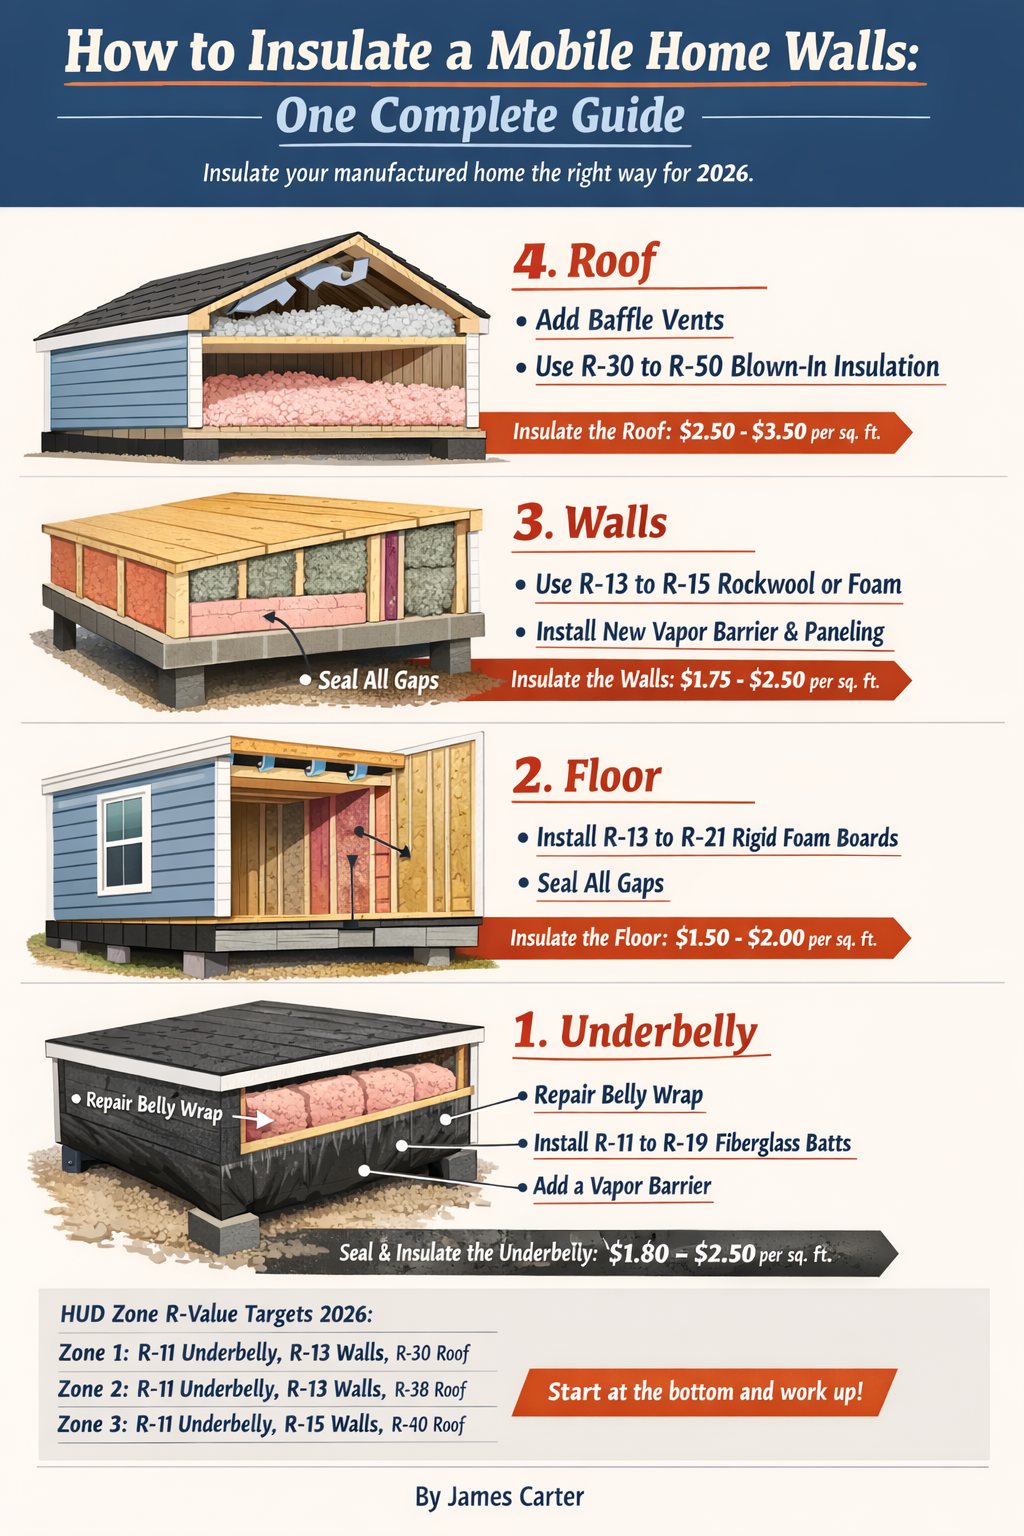
This guide covers all four zones — underbelly, floor, walls, and roof — with the correct sequence, 2026 material costs, HUD zone R-value targets, and the specific products that work in manufactured housing. Start at the bottom and work up.
In this guide
Why mobile home insulation is completely different from site-built homes

Manufactured homes are governed by the HUD Code, not the International Residential Code. The structural constraints of the permanent steel chassis, shallow 2×3 wall framing, and the unique underbelly system that houses plumbing and ductwork create an entirely different thermal challenge from anything in a site-built home.
The factory R-value gap
| Assembly zone | Typical factory R-value | Modern site-built target | 2026 high-performance target |
|---|---|---|---|
| Exterior wall cavity | R-7 to R-11 | R-15 to R-21 | R-21+ |
| Floor / underbelly | R-11 to R-22 | R-30 | R-33+ |
| Roof / ceiling | R-14 to R-30 | R-38 to R-49 | R-49+ |
The three HUD thermal zones
| HUD zone | Region | Floor min. | Wall min. | Ceiling min. |
|---|---|---|---|---|
| Zone 1 | Gulf States, Hawaii, deep South | R-13 | R-13 | R-30 |
| Zone 2 | Mid-Atlantic, Midwest, Pacific NW | R-19 | R-21 | R-30 |
| Zone 3 | Northern states, high altitude | R-30 | R-21 | R-38 |
The underbelly system: In a site-built home, plumbing and ductwork run inside conditioned walls or a heated basement. In a manufactured home they run beneath the floor joists, inside a belly wrap that faces the open crawl space. If that wrap tears, your pipes and ducts are exposed directly to outside air. This is why underbelly work always comes first.
Steel chassis thermal bridging: The steel I-beams conduct cold far more efficiently than wood. Even perfect floor insulation between joists is bypassed by the beams themselves, creating cold strips across your floor and accelerating condensation where joists meet steel. No perfect DIY fix exists — but the mitigation strategies in the floor section below significantly reduce the impact.
Vapor barrier direction: The vapor barrier must face the warm side — interior living space — not the exterior. Placing it on the wrong side traps moisture in the insulation and causes rot. In northern climates (Zone 3), smart vapor retarders that allow seasonal drying are recommended over rigid 6-mil poly.
Why you cannot blow in attic insulation like a site-built home: Mobile home roof cavities are typically 4–10 inches at the center and taper to 2 inches at the eaves. There is no attic floor to walk on. Filling this cavity solid without maintaining a ventilation path traps moisture under the metal roof skin and rots the decking. Baffles are non-negotiable.
Assess your current insulation before spending a dollar
Find your HUD Data Plate first
Every manufactured home built after June 15, 1976 has a required HUD Data Plate — an 8.5″×11″ document that shows your home’s thermal zone designation, wind zone, and roof load zone. This tells you what R-values your home was designed for and what you’re working with. Common locations:
Kitchen
Inside a cabinet door or on the wall behind the sink base
Master bedroom
Inside the master closet on the wall
Utility area
Near the main electrical panel or furnace closet door
Signs your insulation has already failed
Drafty floors: Air movement at baseboards or through floor registers when heating is off indicates belly wrap tears or gaps
Pipes freezing when neighbors’ don’t: A clear sign of belly wrap failure or missing “wing insulation” around the perimeter
Rodent activity under the home: Mice tunnel through fiberglass batts and destroy their R-value completely. Related: keeping the structure sealed also helps with moisture control under the home
Condensation on interior walls in winter: Warm moist air is hitting cold wall surfaces — the insulation and/or vapor barrier has failed
Large temperature differences room to room: Indicates uneven insulation — the thermal envelope is losing integrity at specific points
The cumulative envelope failure principle: Adding high-performance insulation to one zone while leaving another unsealed creates pressure differentials that accelerate heat loss through the weak area. Adding R-49 to your ceiling while leaving a torn belly wrap does almost nothing. Fix from the bottom up — always.
Underbelly insulation — the highest priority zone
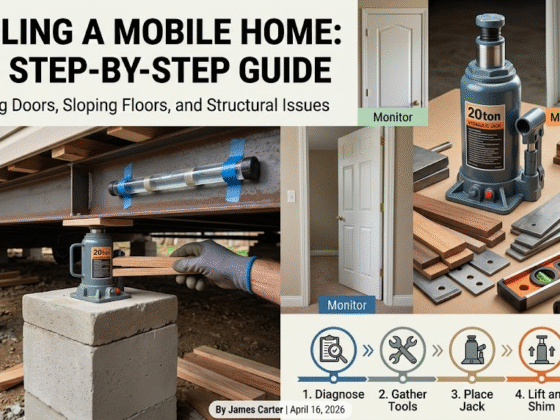
The belly wrap — also called the bottom board or closure paper — is a woven black polyethylene or asphalt-impregnated fiberboard that supports the insulation, provides an air barrier, and prevents rodents from nesting in your floor. When it fails, everything else fails with it. This is the single most impactful upgrade for heating cost reduction and pipe protection. If you have a leveling project scheduled, do the underbelly work at the same time — you’re already underneath the home.
Repair vs. full replacement
✓ Repair (holes under 12 inches)
Use Flex-Mend™ tape with woven polyethylene backing. Generic duct tape or flashing tape fails within 1–2 years due to the dusty crawl space environment and thermal expansion. Cost: ~$50 for 2 rolls.
Full replacement required when:
Original fiberboard is disintegrating. Past plumbing leak has caused mold in the fiberglass. Pests have nested throughout more than 30% of the floor area. Cost: $250–$300 for a 100ft poly roll.
Three methods for re-insulating the underbelly
Method 1: Rim injection blow-in
Best non-invasive optionRemove exterior skirting and pry up the J-rail to insert a rigid fill-tube into the rim joist area. Blow loose-fill insulation into the floor cavity without cutting into the belly wrap. Best for homes where the belly is intact but insulation has settled or been removed.
Method 2: Belly access blow-in
Good for widespread damageCut small “X” slits in the belly wrap every 4–8 feet, insert a flexible hose, and fill each cavity until the wrap begins to bulge slightly. Seal all slits with Flex-Mend™ tape afterwards. Allows precise placement around existing pipes and ducts.
Method 3: Full batt replacement
Maximum control, highest costRemove sections of belly wrap entirely and friction-fit unfaced batts between floor joists. Critical: place insulation underneath the pipes and ducts — not on top of them. Pipes above the insulation are outside the thermal envelope and will freeze. New belly wrap is stapled back up over the batts.
Insulation material comparison for underbelly
| Material | R-value/inch | 2026 DIY cost/sq ft | Verdict |
|---|---|---|---|
| Fiberglass batts | R-3.1 to R-3.4 | $0.30–$1.00 | Low cost, absorbs moisture — use only in dry climates |
| Rockwool Comfortbatt | R-3.2 to R-4.1 | $1.40–$2.50 | Best DIY choice — hydrophobic, fire-rated, resists mold |
| Rigid XPS foam | R-5.0 | $0.60–$0.90 | High R per inch, waterproof — harder to fit around pipes |
| Closed-cell spray foam | R-6.5 to R-7.0 | $1.50–$4.50 | Best performance — bonds to joists, its own vapor barrier — needs professional rig |
2026 complete underbelly re-insulation cost (1,000 sq ft single wide)
| Material | Quantity | Unit price | Total |
|---|---|---|---|
| Polyethylene belly wrap (100ft roll) | 1 roll | $250 | $250 |
| Flex-Mend™ repair tape | 2 rolls | $50 | $100 |
| R-19 PINK Next Gen batts (Owens Corning) | 10 bags | $85 | $850 |
| 6-mil poly vapor barrier | 2 rolls | $120 | $240 |
| Hammer tacker and staples | 1 kit | $60 | $60 |
| Total DIY cost | ~$1,500 | ||
Floor insulation — working from below
Floor insulation sits inside the joist cavities above the belly wrap. The core challenge is the particleboard subfloor — if insulation is compressed directly against it without an air gap, it traps moisture against the wood. Use wire mesh or stand-off pins to hold insulation 1 inch below the subfloor surface. For floor replacement considerations alongside insulation work, see our best flooring for mobile homes guide.
| Strategy | Thickness | R-value achieved | Notes |
|---|---|---|---|
| Standard fiberglass batt | 6.25″ | R-19 | Sags over time without support mesh |
| High-density batt | 5.5″ | R-21 | Better fit in 2×6 joist bay |
| Rigid XPS 2″ continuous | 2″ | R-10 | Best for high-moisture zones — fully waterproof |
| Foil-faced Polyiso 2″ (Rmax Thermasheath-3) | 2″ | R-13 | High R per inch — slight cold-weather performance dip |
| Hybrid: Polyiso + Rockwool | 2″ + 3.5″ | R-30+ | Zone 3 target — best DIY combination |
Why Rockwool beats fiberglass for floors: Rockwool Comfortbatt is hydrophobic — it sheds water rather than absorbing it. It also won’t sag over years the way fiberglass does under its own weight. The density also eliminates the hollow “drum” sound common in mobile home floors. Fire resistance up to 2,150°F is a significant safety margin for the electrical and gas lines running through the same space.
Addressing steel chassis thermal bridging
The I-beams are the most significant thermal weak point and there is no perfect DIY fix for an existing home. Two practical mitigation approaches for 2026:
Reflective wrapping
Before closing the belly wrap, wrap the vertical web of the I-beam in 1/4″ foil-faced foam (Reflectix) to reduce radiant heat transfer to the exterior. Low cost, DIY-friendly.
Insulated skirting
Installing 2-inch XPS foam as skirting creates a warmer crawl space that reduces the temperature differential across the chassis — the most effective passive thermal bridge mitigation available.
Wall insulation — working within 2×3 constraints
Mobile home walls are framed with 2×3 studs — just 2.5 inches of cavity depth. Standard R-13 batts designed for 3.5-inch 2×4 cavities cannot be stuffed in without compression, which collapses the air pockets and drastically reduces real-world thermal performance. This is the most constrained zone in the entire home. If your walls currently have VOG panels and you’re planning a repaint, see our guide on how to paint mobile home walls without peeling — wall insulation work and wall prep often happen together.
⚠️ Why the standard “drill and blow” method fails in mobile homes: Two reasons. First, belt rails — horizontal 2×3 braces halfway up the wall that act as dams, creating large uninsulated voids below them. Second, VOG panel fragility — high-pressure blowing machines can pop vinyl-over-gypsum panels off the studs from the interior side. Both problems stop the standard retrofit technique before it gets started.
Option 1: Professional injection foam
Best performance — $2,000–$5,000Low-expansion injection foam (e.g., RetroFoam) is the most effective wall retrofit method. It expands slowly, flows around belt rails and wiring, and provides an air-seal that batts cannot match. Achieves an effective R-12 to R-15 in a 2.5-inch cavity — close to the physical maximum. Best ROI if you’re planning to stay 10+ years.
Option 2: Interior rigid foam overlay (DIY)
$1.25–$2.00/sq ftGlue 1-inch foil-faced Polyiso boards (Johns Manville AP Foil) over existing VOG panels using foam-safe adhesive. Install 1/4″ wood paneling or 1/2″ drywall over the top. Important warnings: reduces room dimensions by 1.5 inches per wall and requires extending all electrical outlet boxes. Adds approximately R-7 over the existing factory insulation. Works well during a broader interior renovation — see mobile home remodel ideas on a budget.
Option 3: Exterior XPS + new siding (highest performance)
$3.50–$6.50/sq ftIf the home is being re-sided, install 1.5 to 2 inches of continuous XPS board (Owens Corning FOAMULAR NGX 250) beneath new vinyl or fiber-cement siding. This eliminates thermal bridging through the studs — something interior insulation cannot do — and adds a continuous R-10 barrier that effectively doubles the wall’s thermal resistance. Best long-term solution for Zone 3 homes.
| Strategy | Realistic R-value | 2026 DIY cost/sq ft | Best for |
|---|---|---|---|
| Factory original (baseline) | R-4 to R-7 | — | — |
| Interior Polyiso overlay | R-11 to R-14 | $1.25–$2.00 | Interior renovation projects |
| Professional injection foam | R-12 to R-15 | Professional only | Long-term ownership, Zone 2/3 |
| Exterior XPS + new siding | R-18 to R-22 | $3.50–$6.50 | Re-siding projects, Zone 3 priority |
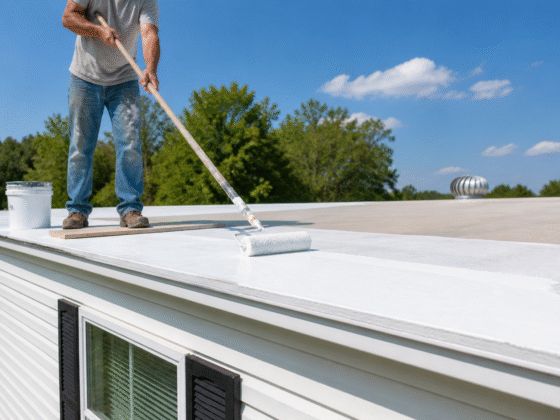
Roof and ceiling insulation
The roof approach is entirely determined by whether your home has a flat metal roof or a pitched shingle/metal roof-over. These are fundamentally different projects.
Flat roof: blown-in techniques
Flat roofs are closed-cavity systems with no attic access. Remediation requires cutting access points and blowing in loose-fill fiberglass (not cellulose — cellulose is too heavy for thin ceiling panels and absorbs the condensation common under metal roof skins).
The Apex method
Cut 10-inch square holes along the center ridge every second truss bay. Use a flexible 2-inch tube to blow loose fiberglass toward the eaves from the center. Fill until resistance is felt at the eaves.
The Edge Lift method
Remove the perimeter J-rail and carefully pry the metal skin up enough to insert a rigid muffler pipe. Blow fill from the eaves toward the center. Slower but avoids cutting the roof surface.
The 1/150 ventilation rule — do not skip this: Install plastic baffles (e.g., Durovent) at the eaves before blowing to maintain a minimum 1.5-inch air gap between insulation and the roof deck. Filling the cavity solid with no ventilation path traps moisture and rots the decking within a few seasons. You need 1 square foot of net free ventilation for every 150 square feet of ceiling area.
The roof-over: highest performance upgrade
A shingle-over or metal roof-over installs a new roof system on top of the existing one, with rigid foam insulation underneath. This is the most effective way to dramatically increase insulation capacity without disturbing the interior ceiling.
| Roof upgrade | DIY cost/sq ft | Annual savings | Payback |
|---|---|---|---|
| Ceiling blow-in (loose fiberglass) | $0.60–$1.00 | 10–15% | 3–5 years |
| Rigid Polyiso roof-over (2–4″ foam under new metal) | $7.00–$13.00 | 25–35% | 8–12 years |
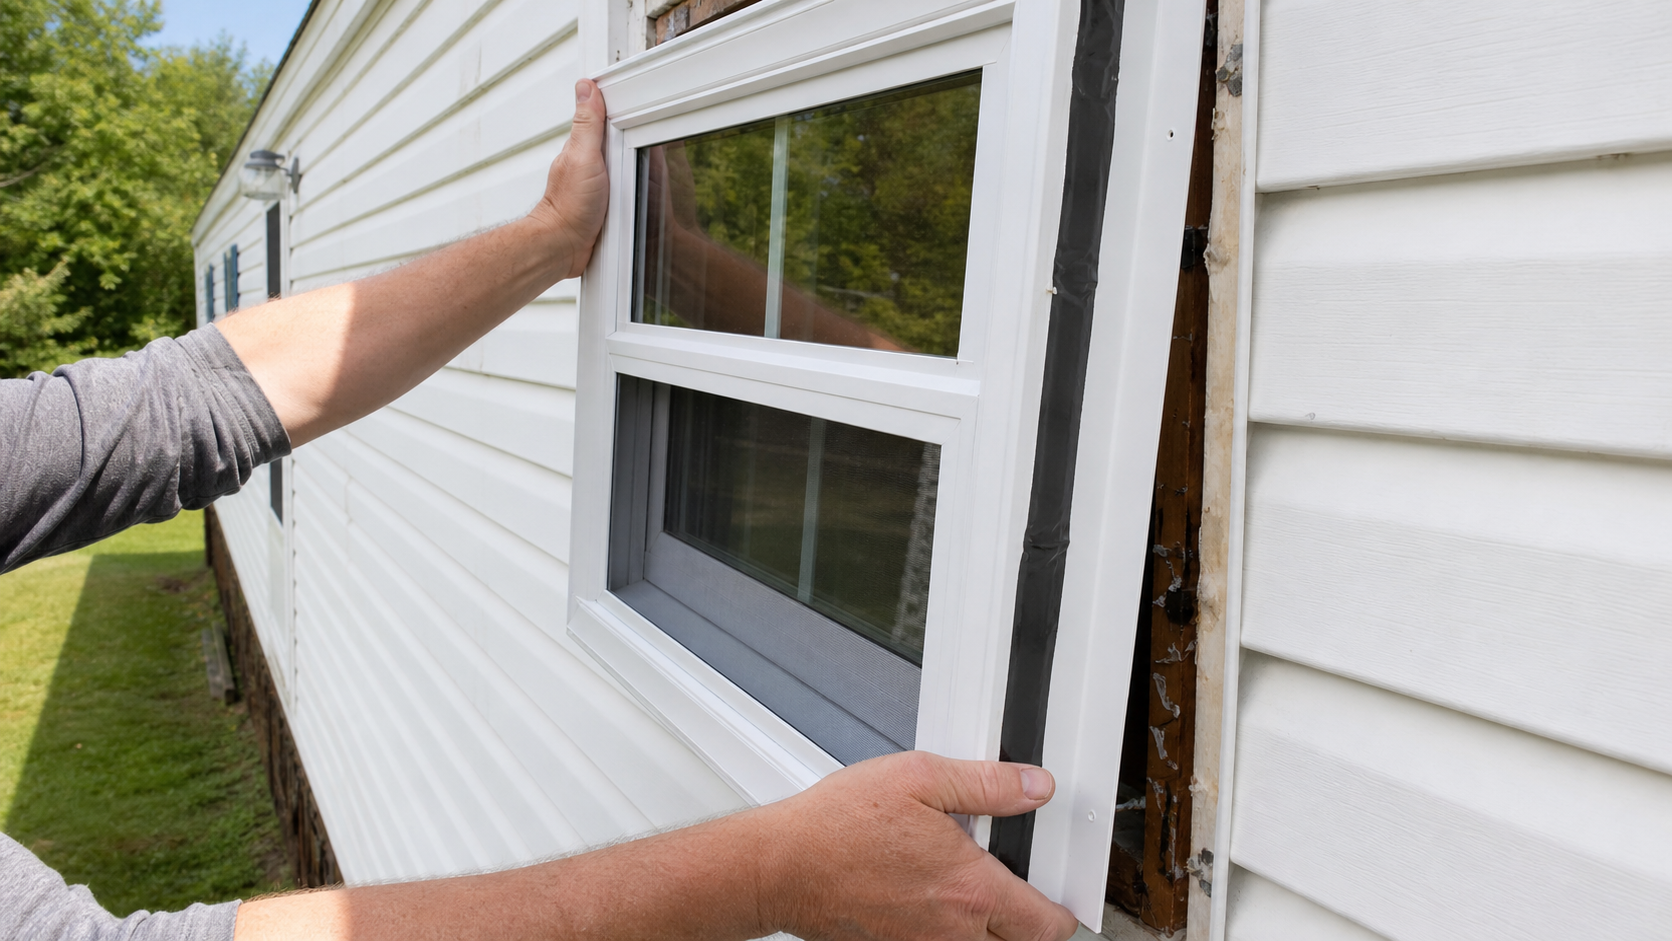
Windows and doors — the thermal weak points
Older manufactured homes commonly have single-pane aluminum frame windows with an R-value of approximately R-1 — effectively a hole in the wall through which heat radiates out. Full replacement is an option worth considering; if your home insurance may cover window damage, it’s worth checking: does home insurance cover window replacement.
Window film insulation kits (Duck Max Strength, 3M Indoor) — $15–$30
Heat-shrink film creates a dead-air pocket that reduces conductive heat loss through glass by up to 20%. Easy DIY install, no tools required. Best first step before committing to full window replacement budget.
Weatherstripping — $8–$25 per door
Manufactured home door frames are frequently out-of-square from settling. Use V-Strip tension seal for the top and sides where gaps are uneven. Standard foam tape only works for stationary windows — the adhesive fails with repeated door friction within one season.
Door sweeps — $12–$25
Install a metal-backed rubber sweep (Duck Brand) on the interior bottom of exterior doors. Mobile home exterior doors typically use a 36-inch sweep. This single upgrade eliminates drafts that make rooms feel 3–5°F colder than the thermostat reading.
Full window replacement (Kinro Vinyl dual-pane Low-E) — $4,500 for 10 windows
With estimated annual energy savings of $350, the payback period is approximately 12.8 years. This makes window replacement the lowest priority upgrade — do the underbelly and ceiling first, which both pay back in 3–5 years. Windows make sense after all other zones are addressed.
The upgrade priority order — where to spend first
Building scientists in 2026 recommend a strict bottom-up sequence. Air sealing and moisture control must precede R-value increases — adding insulation over air leaks traps moist air inside the structure and accelerates rot rather than preventing it.
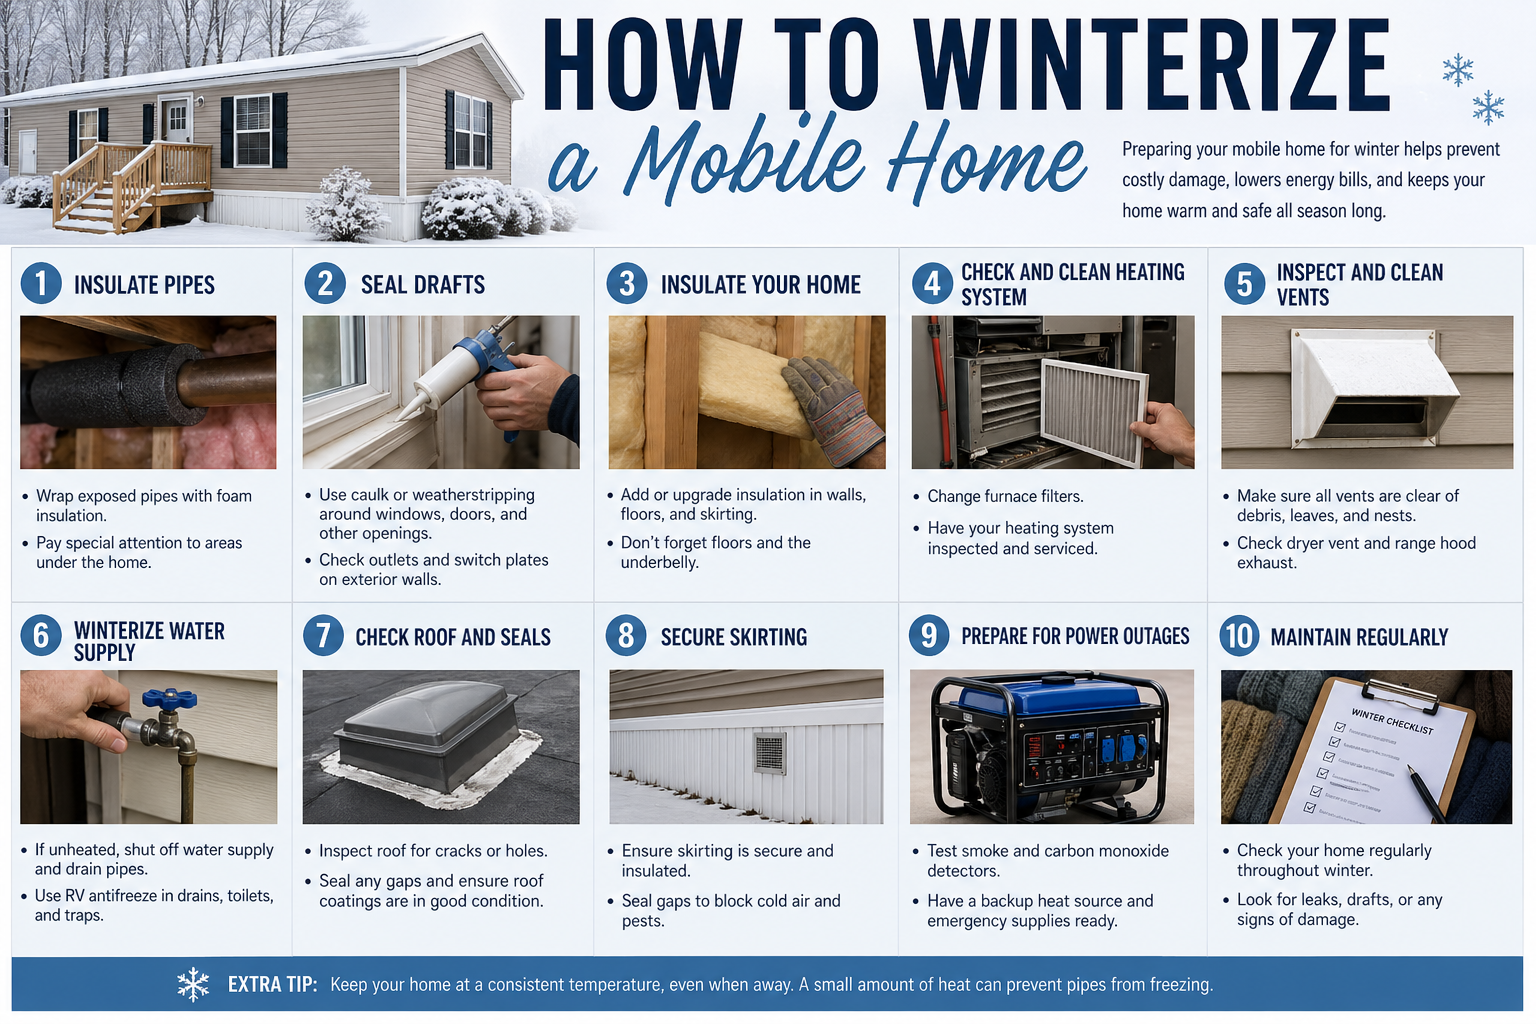
Air sealing — do this before anything else
Use 1-part spray foam and silicone caulk to seal: marriage line gaskets in double wides, plumbing penetrations under sinks and the tub surround, electrical outlets and switches on exterior walls. Cost: $50–$100 in materials. Payback: immediate.
Underbelly and ground vapor barrier
Install a 6-mil poly ground cover and upgrade belly insulation to at least R-22. This removes the largest thermal load, protects pipes, and reduces heating costs by 10–20% alone. DIY cost: ~$1,500. Payback: 3–5 years.
Ceiling insulation top-off
Increase ceiling insulation to your zone’s target (R-30 for Zone 1/2, R-38 for Zone 3) using blown loose-fill fiberglass. This is the second highest-return upgrade. DIY cost: $600–$1,000 for materials. Payback: 3–5 years.
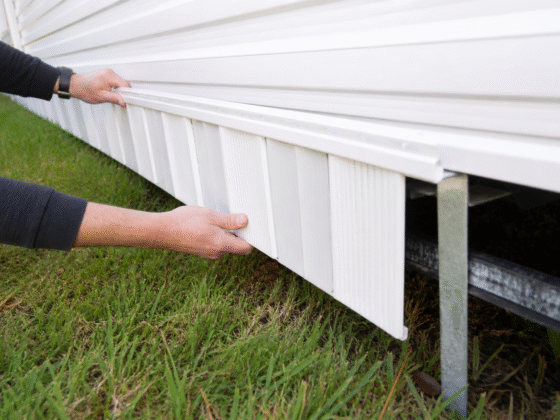
Insulated skirting and perimeter protection
Replace standard vinyl skirting with 2-inch XPS foam board to create a warmer crawl space. Dramatically reduces thermal bridging through the chassis. DIY cost: $400–$800. Pairs with leveling and pier maintenance work.
Wall insulation upgrade
Address walls last — they are the most constrained zone and the most disruptive to upgrade. Interior Polyiso overlay during a planned renovation, or professional injection foam for an undisturbed finish. Cost: $1.25–$5.00/sq ft depending on method.
Windows — last priority
Start with film kits and weatherstripping ($50 total). Only proceed to full window replacement after all other zones are addressed — the 12+ year payback makes it the lowest ROI upgrade in the sequence.
Frequently asked questions
What is the best insulation for a mobile home?
Closed-cell spray foam is technically the best performer because it air-seals and insulates simultaneously while adding structural rigidity to the floor joists. However, for DIY affordability, the best practical combination is Rockwool Comfortbatt in the floor (hydrophobic, fire-rated, doesn’t sag) combined with blown-in loose fiberglass in the ceiling cavity. For the underbelly, Rockwool or fiberglass batts placed correctly below the pipes and ducts provide the necessary protection at reasonable cost.
How do I insulate the bottom of my mobile home?
Start by inspecting the belly wrap from the crawl space — patch any holes under 12 inches with Flex-Mend™ tape, or replace sections that are disintegrating. Then either inject loose-fill insulation through the rim joist or cut access slits and friction-fit unfaced batts between floor joists. The critical rule: place insulation underneath all pipes and ductwork so they remain inside the thermal envelope. Finish by stapling a new 6-mil poly vapor barrier across the ground under the home.
Can I add insulation to mobile home walls?
Yes, but the 2.5-inch stud cavity limits your options. The standard drill-and-blow method used in site-built homes often fails here due to belt rails blocking fill and VOG panels cracking under pressure. The most effective non-invasive method is professional low-expansion injection foam (RetroFoam). The best DIY approach is adding 1-inch foil-faced Polyiso boards over the existing wall surface, then covering with thin paneling or drywall. This reduces room dimensions slightly but adds meaningful R-value.
What R-value do I need for a mobile home floor?
HUD minimums are R-13 (Zone 1), R-19 (Zone 2), and R-30 (Zone 3). For 2026 performance targets that ensure warm floors and pipe safety in sub-zero temperatures, Zone 3 homes should aim for R-30 minimum — achievable with a hybrid approach of 2-inch foil-faced Polyiso plus Rockwool batts in a standard 2×6 floor joist bay. Zone 1 and 2 homes can typically meet targets with R-19 fiberglass or Rockwool batts plus belly wrap integrity.
How much does it cost to insulate a mobile home?
A complete DIY envelope upgrade — underbelly, ceiling blow-in, air sealing, and skirting — for a 1,000 sq ft single wide typically costs $2,500–$4,500 in materials. The underbelly alone runs ~$1,500. Ceiling blow-in adds $600–$1,000. Air sealing materials are $50–$100. Wall insulation, if included, adds $1,200–$2,000 for the DIY interior overlay method or $2,000–$5,000 for professional injection foam. Windows are separate and best treated as a distinct long-term project.
Does insulating a mobile home make a difference?
Yes — significantly. A complete thermal upgrade reduces heating and cooling bills by 10–40% depending on the home’s current condition and the zone it’s in. Beyond energy costs, proper insulation dramatically extends the structural life of the home by reducing condensation that causes subfloor rot, wall rot, and ceiling panel failure. Homes with intact thermal envelopes also maintain significantly more consistent room temperatures and are quieter — mineral wool insulation in floors and walls provides meaningful acoustic dampening.
How do I know if my mobile home is well insulated?
Indicators of a healthy thermal envelope include: consistent temperatures room to room with no significant cold spots, no condensation on interior walls or windows in winter, no ice dams forming on the roof edge after heavy snow, floors that feel warm rather than cold in winter even away from vents, and heating/cooling bills that are proportionate to your home’s size. If any of these fail, start the assessment process with the HUD Data Plate and a crawl space inspection of the belly wrap.
More mobile home improvement guides
Good insulation is the foundation every other upgrade builds on. Once your thermal envelope is solid, every dollar spent on flooring, kitchen work, and interior improvements performs better and lasts longer.


3 comments